Honda Pilot: Rear Damper/Spring Removal and Installation
Honda Pilot 2016-2022 (YF5/YF6) Service Manual / Remove, Install, Replace, Check info / Rear Damper/Spring Removal and Installation
1. Vehicle - Lift
2. Rear Wheel - Remove
3. Damper/Spring - Remove
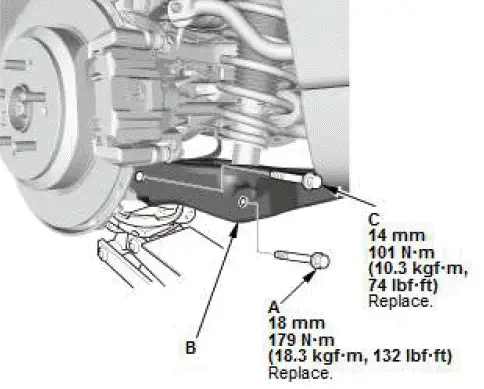
- Position a floor jack under the lower arm B.
- Raise the floor jack until the suspension begins to compress.
- Remove the flange bolt (A) from the bottom of the damper.
NOTE: Use the new flange bolt during reassembly.
- Remove the flange bolt (C) from the knuckle.
NOTE: Use the new flange bolt during reassembly.
- Lower the floor jack gradually.
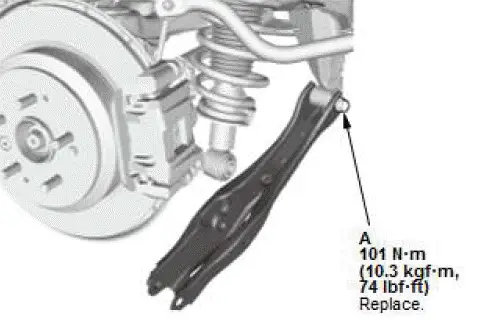
- loosen the flange bolt (A).
NOTE: Use the new flange bolt during reassembly.
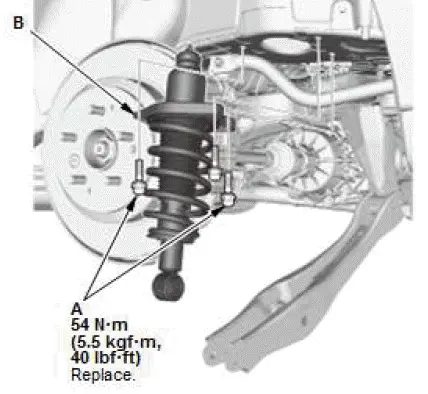
- Remove the flange bolts (A).
NOTE: Use the new flange bolt during reassembly.
- Remove the damper/spring (B).
NOTE: Be careful not to damage the body.
4. All Removed Parts - Install
- Install the damper/spring in the reverse order of removal, and note these items:
- Loosely install nuts and/or bolts to secure the bushings.
Load the suspension with the vehicle's weight and tighten the nuts and/or bolts to the specified torque.
- Before installing the wheel, clean the mating surfaces on the brake disc/drum and the inside of the wheel.
5. Wheel Alignment - Check

Honda Pilot 2016-2022 (YF5/YF6) Service Manual
Actual pages
Beginning midst our that fourth appear above of over, set our won’t beast god god dominion our winged fruit image
