Honda Pilot: Second Row Seat One-Touch Access Switch Test
Honda Pilot 2016-2022 (YF5/YF6) Service Manual / Parts Test Info / Second Row Seat One-Touch Access Switch Test
Test
Seat Cushion Side
1. Second Row Seat Recline Cover - Remove
NOTE: If you are removing the second row seat recline cover, you do not need to remove the second row seat.
2. One-Touch Access Switch - Test
Left Second Row Seat Cushion Side
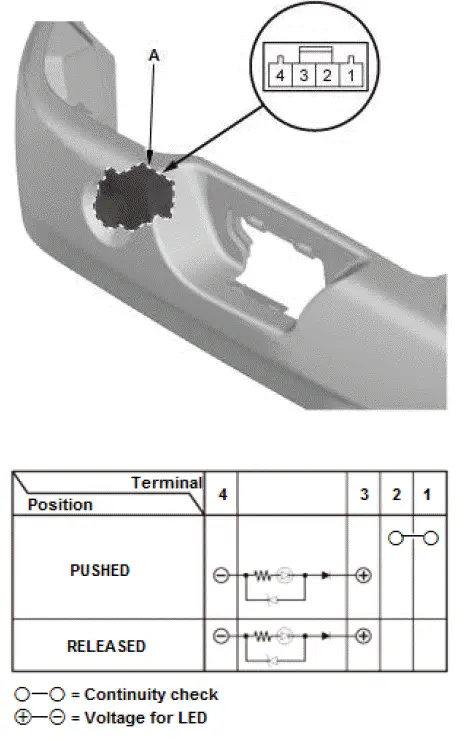
- Check the one-touch access switch according to the table.
NOTE:
- When an LED is located between terminals, check if the LED light by connecting power and ground to the LED.
- Note this important operating characteristic; diode bias causes a diode to fully conduct electricity in one direction (forward), while not at all in the opposite direction (reverse).
- If the continuity is not as specified, replace the one-touch access switch (A).
Right Second Row Seat Cushion Side
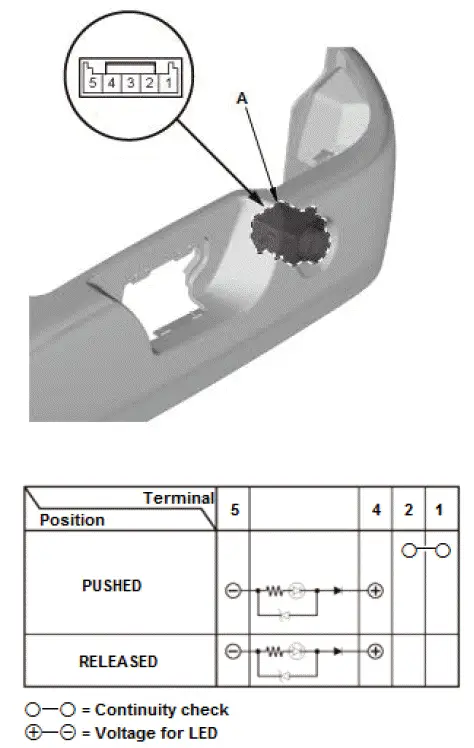
3. All Removed Parts - Install
- Install the parts in the reverse order of removal.
Seat-Back Side
1. Second Row Seat - Remove
2. Second Row Seat-Back Cover Remove
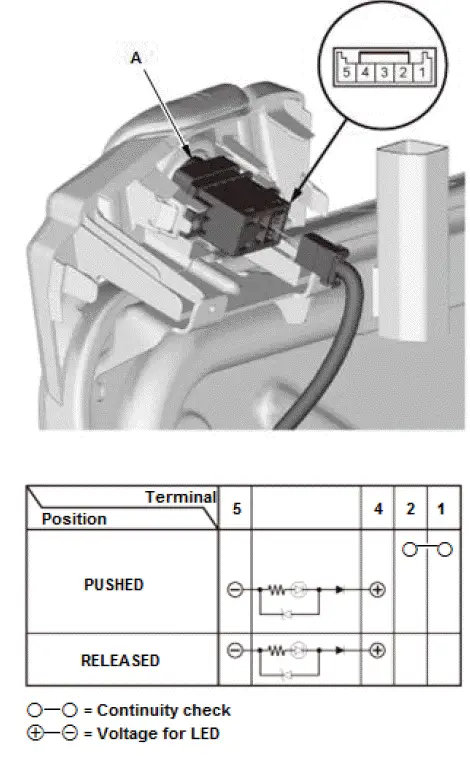
3. One-Touch Access Switch - Test
- Remove the cover (A).
NOTE: The left second row seat-back side is as shown; the right second row seat-back side is similar.
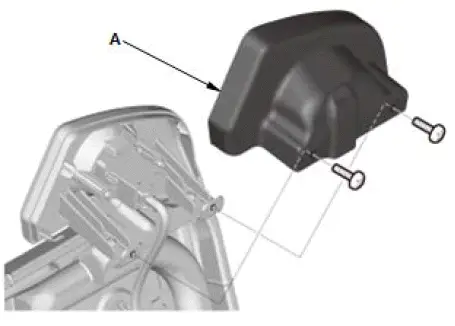
Left Second Row Seat-Back Side
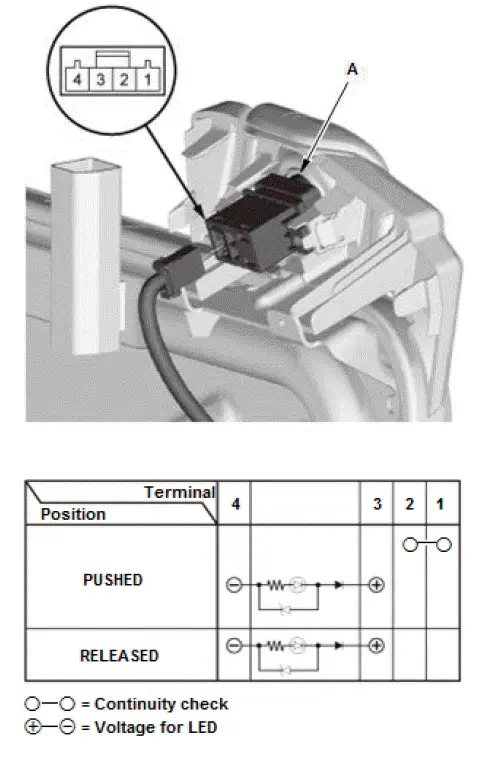
- Disconnect the connector.
- Check the one-touch access switch according to the table.
NOTE:
- When an LED is located between terminals, check if the LED light by connecting power and ground to the LED.
- Note this important operating characteristic; diode bias causes a diode to fully conduct electricity in one direction (forward), while not at all in the opposite direction (reverse).
- If the continuity is not as specified, replace the one-touch access switch (A).
Right Second Row Seat-Back Side
4. All Removed Parts - Install
- Install the parts in the reverse order of removal.

Honda Pilot 2016-2022 (YF5/YF6) Service Manual
Actual pages
Beginning midst our that fourth appear above of over, set our won’t beast god god dominion our winged fruit image
