Honda Pilot: A/C Condenser Removal and Installation
Honda Pilot 2016-2022 (YF5/YF6) Service Manual / Remove, Install, Replace, Check info / A/C Condenser Removal and Installation
Removal/Installation
1. A/C Refrigerant - Recover
2. Front Bumper - Remove
3. Front Bumper Center Upper Beam - Remove
4. Hood Latch - Remove
5. Front Bumper Air Screen - Remove
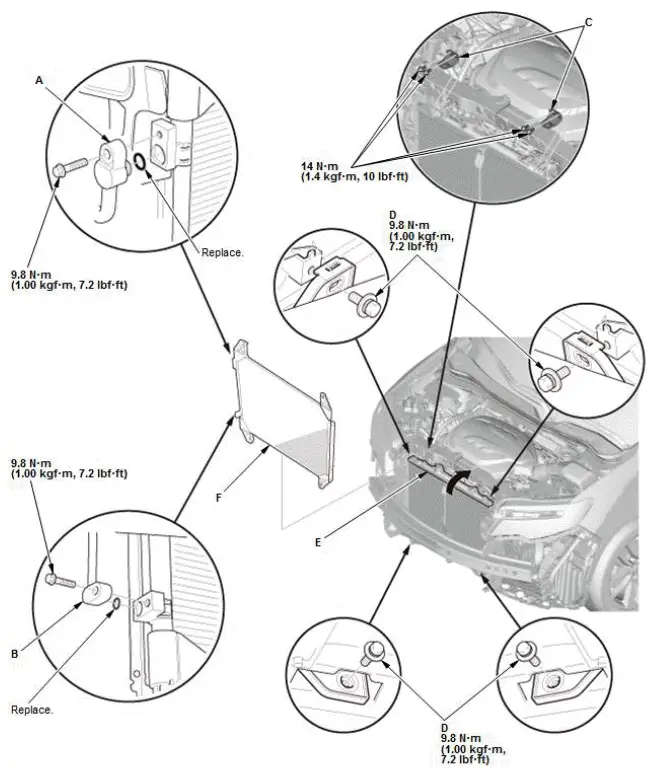
6. A/C Condenser - Remove
- Disconnect the discharge hose (A).

NOTE: Be careful not to damage the radiator and A/C condenser fins when removing the A/C condenser.
7. All Removed Parts - Install
- Install the parts in the reverse order of removal, and note these items:
- If you are installing a new A/C condenser, add the appropriate refrigerant oil for the A/C compressor which installed to the vehicle.
- A new O-ring should be used at each fitting. Prior to installation, apply a thin coat of the same refrigerant oil used in the A/C compressor. Be sure to use the correct O-ring for refrigerant types to avoid leakage.
- Immediately after using the oil, reinstall the cap on the container, and seal it to avoid moisture absorption.
- Do not spill the refrigerant oil on the vehicle, because it may damage painted surfaces. If refrigerant oil contacts the paint, wash it off with water immediately.
- Be careful not to damage the radiator and A/C condenser fins when installing the A/C condenser.
- Charge the system with the specified amount of refrigerant.
8. Hood Latch - Adjust
9. Millimeter Wave Radar - Aim (For Some Models)

Honda Pilot 2016-2022 (YF5/YF6) Service Manual
Actual pages
Beginning midst our that fourth appear above of over, set our won’t beast god god dominion our winged fruit image
