Honda Pilot: A/C System Test
Test
CAUTION
- Air conditioning refrigerant or lubricant vapor can irritate your eyes, nose, or throat.
- Be careful when connecting service equipment.
- Do not breathe refrigerant or vapor.
SRS components are located in this area. Review the SRS component locations and the precautions and procedures before doing repairs or service.
The performance test will help determine if the A/C system is operating within specifications.
NOTE:
- If accidental system discharge occurs, ventilate the work area before resuming service.
- Additional health and safety information may be obtained from the refrigerant and lubricant manufacturers.
Performance Test
1. A/C System - Inspect
- Do the A/C system inspection, and correct any problems found.
2. A/C Recover/Recycle/Recharge Machine - Connect
3. Glove Box - Remove
4. A/C System - Test
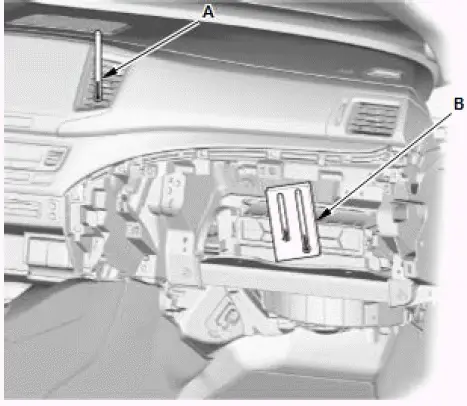
- Determine the relative humidity and air temperature.
- Insert a thermometer (A) in the dashboard center vent.
- Place a hygro-thermometer (B) near the blower unit's recirculation inlet duct.
- Test conditions:
- The blower intake temperature must be at least 68 ºF (20 ºC).
- Move the vehicle out of direct sunlight and let it cool down to the surrounding (ambient) temperature. If necessary, wash the vehicle to cool it down more quickly.
- Open the hood.
- Open the front doors.
- Apply the parking brake.
- Shift the transmission to P or N position/mode.
- Start the engine.
- Set the A/C system to the following items.
- A/C: ON
- Temperature control: MAX COOL
- Mode control: VENT
- Recirculation control: RECIRCULATE
- Fan control: Max
- Using the throttle pedal depressor tool to run the engine at a steady 1,500 rpm.
- No driver or passengers in vehicle.
- Inspect the A/C components for the following conditions:
- A/C compressor clutch not engaged.
- Abnormal frost areas.
- Unusual noises.
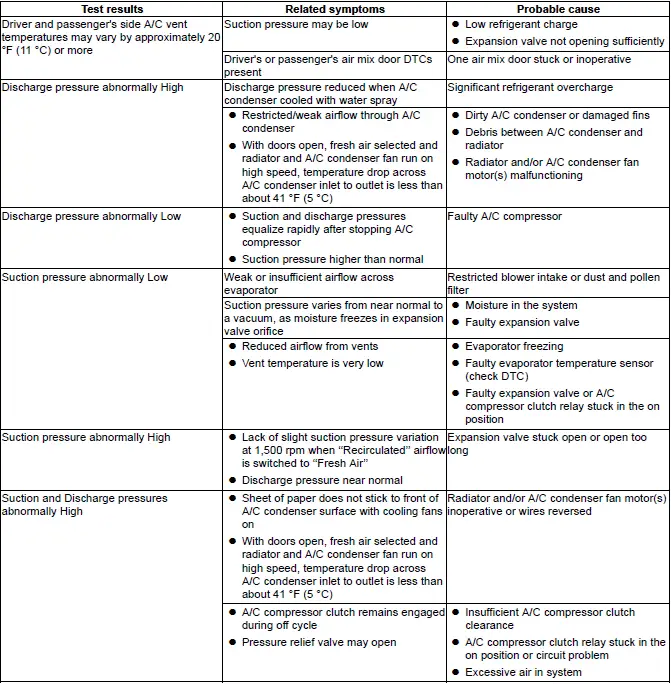
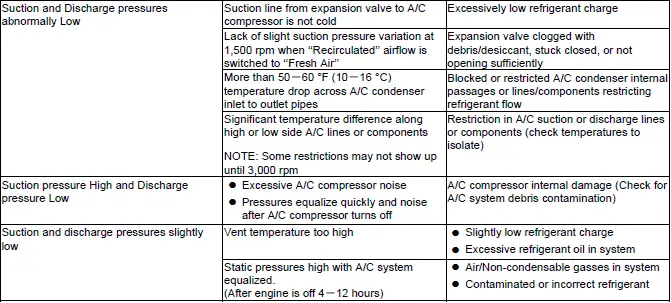
If you observe any of these conditions, refer to the Symptom Troubleshooting Index.
- After running the air conditioning for 10 minutes under the test conditions, read the delivery temperature from the thermometer in the center vent, the blower intake temperature near the blower unit, and the discharge (high) and suction (low) pressures on the A/C gauges.
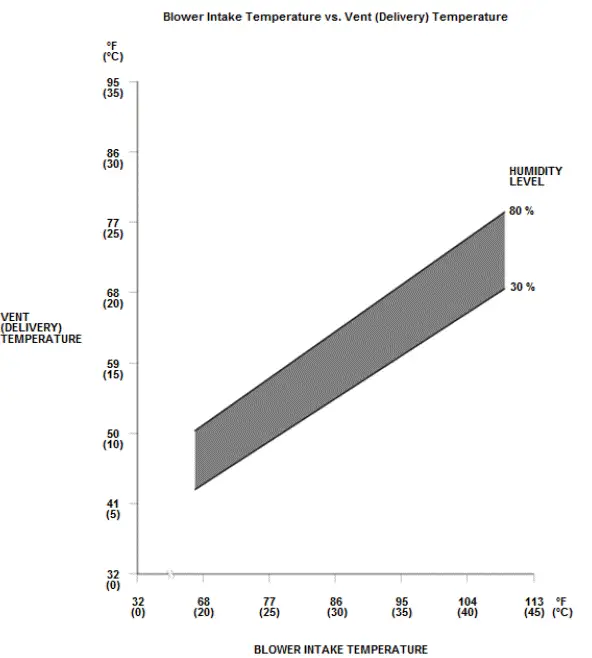
7. To complete the vent (delivery)/blower intake temperature chart:
- Mark the vent (delivery) temperature on the vertical line.
- Mark the blower intake temperature on the bottom line.
- Draw a vertical line from the blower intake temperature mark.
- Draw a horizontal line from the vent (delivery) temperature mark until it intersects the vertical line.
NOTE: The vent (delivery) temperature and blower intake temperature should intersect in the shaded area. Any measurements outside the line may indicate the need for further inspection.
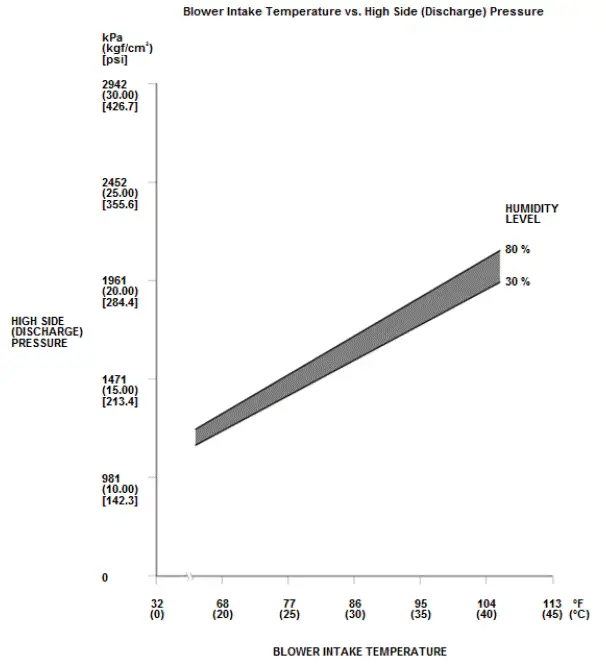
8. To complete the high side (discharge) pressure/blower intake temperature chart:
- Mark the high side (discharge) pressure on the vertical line.
- Mark the blower intake temperature on the bottom line.
- Draw a vertical line from the blower intake temperature mark.
- Draw a horizontal line from the high side (discharge) pressure mark until it intersects the vertical line.
NOTE: The high side (discharge) pressure and blower intake temperature should intersect in the shaded area. Any measurements outside the line may indicate the need for further inspection.
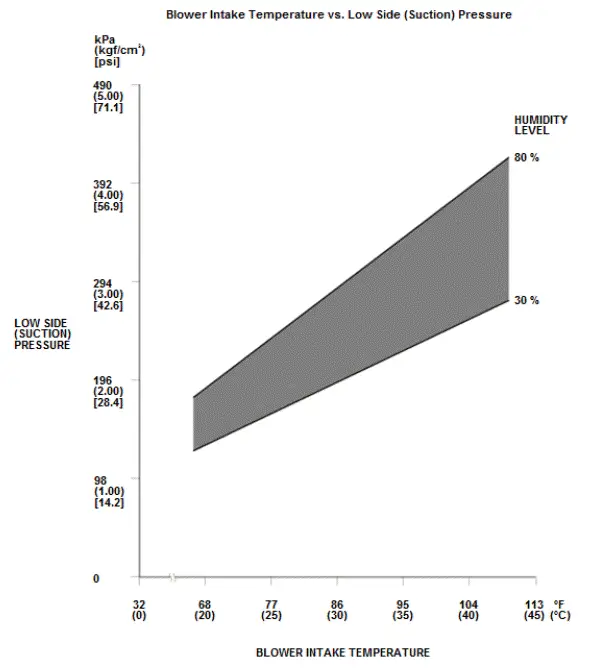
9. To complete the low side (suction) pressure/blower intake temperature chart:
- Mark the low side (suction) pressure along the vertical line.
- Mark the blower intake temperature along the bottom line.
- Draw a vertical line from the blower intake temperature mark.
- Draw a horizontal line from the low side (suction) pressure mark until it intersects the vertical line.
NOTE: The low side (suction) pressure and blower intake temperature should intersect in the shaded area. Any measurements outside the line may indicate the need for further inspection.
Pressure Test
5. A/C System Pressure Test
Special Tool Required
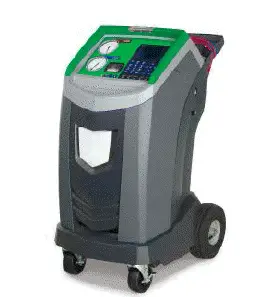
- R-1234yf A/C Recover/Recycle/Recharge Machine ROB421234
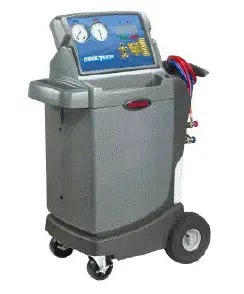
- R134a A/C Automatic Recover/ Recycle/ Recharge Machine ROB48920T ROB48920T
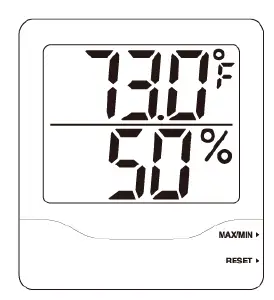
- Big Digit Hygro-Thermometer PYR445703, commercially available
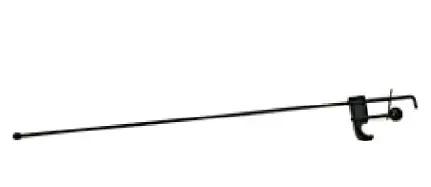
- Throttle Pedal Depressor Tool B240B, commercially available
*These tools are available through the Honda Tool and Equipment Program; call 888-424-6857.

Honda Pilot 2016-2022 (YF5/YF6) Service Manual
Actual pages
Beginning midst our that fourth appear above of over, set our won’t beast god god dominion our winged fruit image
