Honda Pilot: Audio Unit Removal and Installation
Honda Pilot 2016-2022 (YF5/YF6) Service Manual / Remove, Install, Replace, Check info / Audio Unit Removal and Installation
Removal/Installation
NOTE:
- Do not work in a dusty or dirty place.
- Do not work with dirty hands.
- If you are replacing the audio unit, write down the audio presets (if possible), and enter them into the new audio unit.
1. Dashboard Center Middle Trim - Remove
2. Audio Unit Assembly - Remove
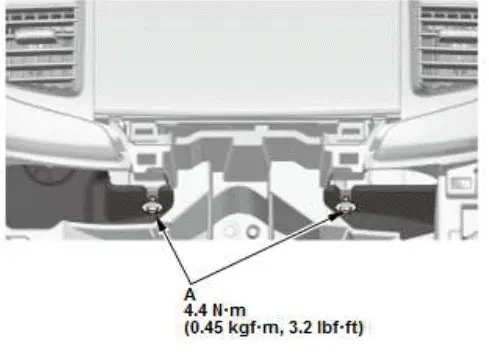
- Loosen the bolts (A).
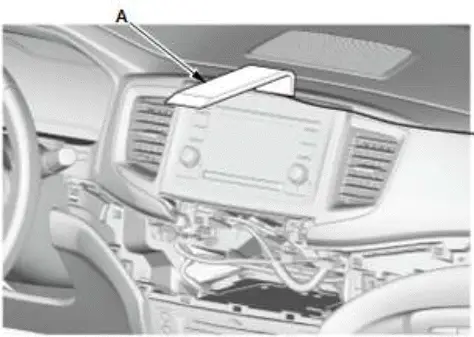
- Pull out the audio unit assembly with the appropriate trim tool (A).
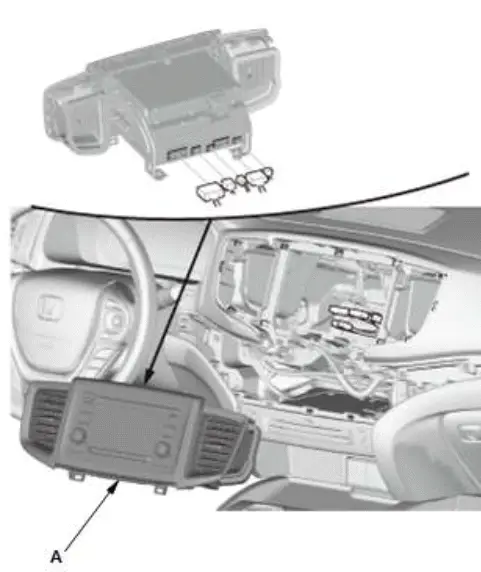
- Disconnect the connectors, then remove the audio unit assembly.
3. Audio Unit - Remove
NOTE:
- Do not touch the circuit board(s) with your bare hands.
- Discharge static electricity from your body before and during the work.
- Do not touch the terminal connector of the flat plate cable with your bare hands (If you have touched it, wipe it off thoroughly).
- Remove the dashboard center vents.
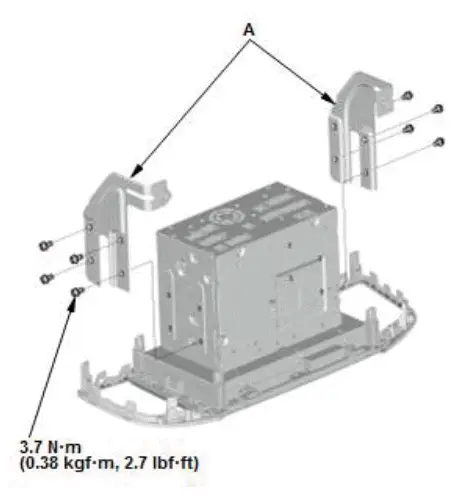
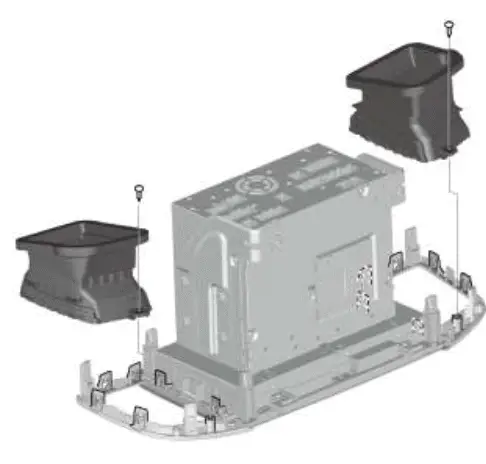
- Remove the brackets (A).
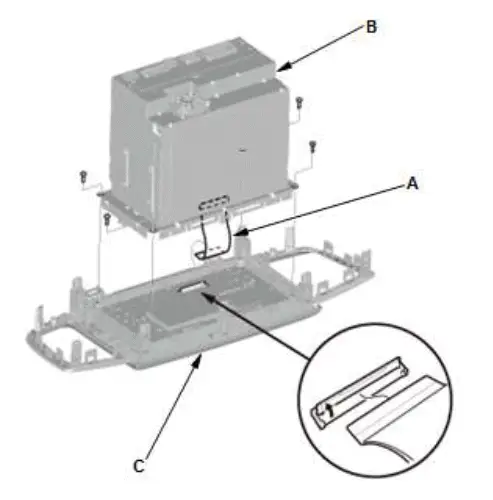
- Disconnect the flexible printed circuit (A).
- Remove the audio unit (B) from the audio panel (C).
4. All Removed Parts - Install
- Install the parts in the reverse order of removal.
NOTE: After Installation, do the In Line Diag in the System Diagnostic Mode to confirm that there are no problems in the system.

Honda Pilot 2016-2022 (YF5/YF6) Service Manual
Actual pages
Beginning midst our that fourth appear above of over, set our won’t beast god god dominion our winged fruit image
