Honda Pilot: Audio-Navigation Unit Removal and Installation
Honda Pilot 2016-2022 (YF5/YF6) Service Manual / Remove, Install, Replace, Check info / Audio-Navigation Unit Removal and Installation
Removal/Installation
NOTE:
- Do not work in a dusty or dirty place.
- Do not work with dirty hands.
- If the audio-navigation unit is replaced, do not remove the SD card. The SD is provided in the new unit.
- If you are replacing the audio-navigation unit, write down the audio presets (if possible), and enter them into the new audio- navigation unit.
- After installing the audio-navigation unit, park the vehicle outside, and do the GPS initialization.
- When the audio-navigation unit is replaced or disconnected, do the Map Matching. This part of the initialization matches the
GPS coordinates with a road on the map screen. To do this part of the procedure, make sure that the navigation system
displays a map, and drive the vehicle on a mapped road shown on the map screen. Do not enter a destination at this time.
When the name of the current road you are driving on appears at the bottom of the screen, the entire procedure is complete.
1. Dashboard Center Middle Trim - Remove
2. Audio-Navigation Unit Assembly - Remove
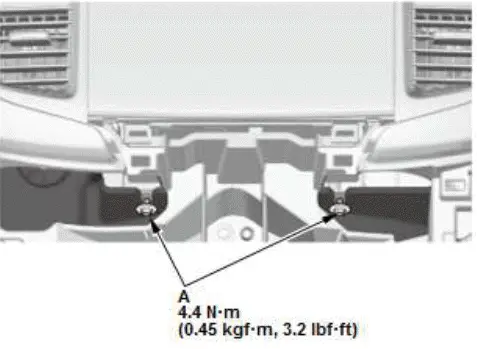
- Loosen the bolts (A).
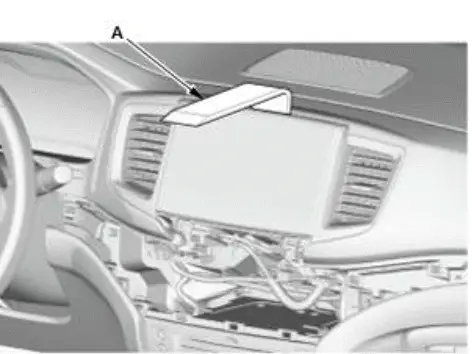
- Pull out the audio-navigation unit assembly with the appropriate trim tool (A).
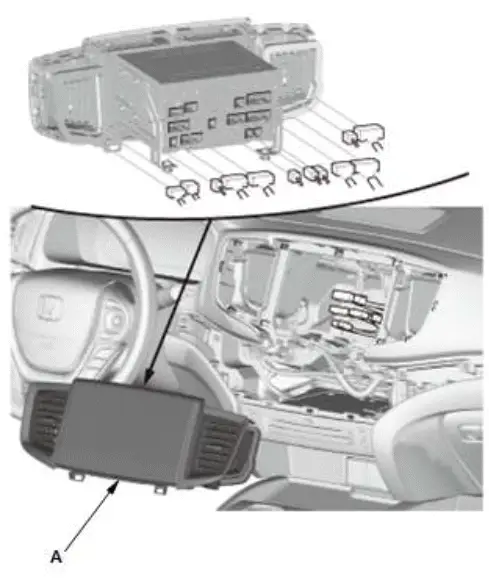
- Disconnect the connectors, then remove the audio- navigation unit assembly (A).
3. Audio-Navigation Unit - Remove
NOTE:
- Do not touch the circuit board(s) with your bare hands.
- Discharge static electricity from your body before and during the work.
- Do not touch the terminal connector of the flat plate cable with your bare hands (If you have touched it, wipe it off thoroughly).
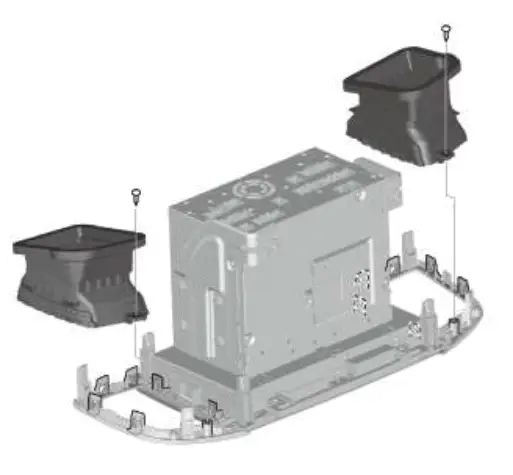
- Remove the dashboard center vents.
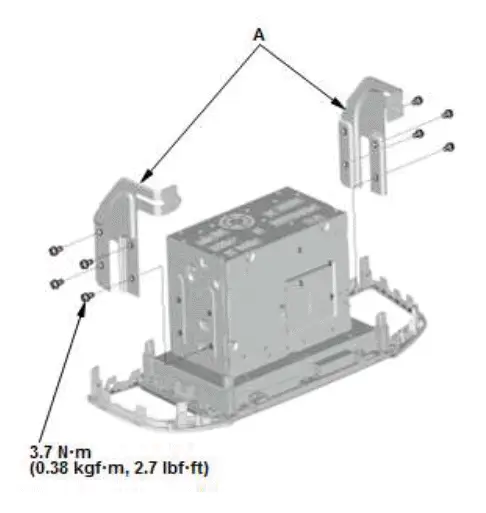
- Remove the brackets (A).

- Remove the cover (A), then disconnect the flexible printed circuits (B).
- Remove the clip (C) from the cover if necessary.
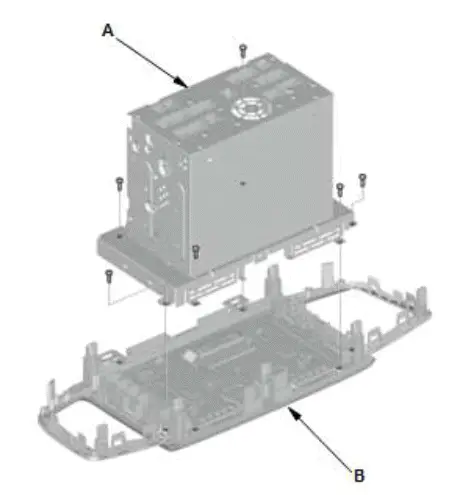
- Remove the audio-navigation unit (A) from the audio panel (B).
4. All Removed Parts - Install
- Install the parts in the reverse order of removal.
NOTE:
- After Installation, do the System Links in the System Diagnostic Mode to confirm that there are no problems in the system.
- If the audio-navigation unit was replaced, it may take up to 30 minutes for the navigation system to calibrate and operate correctly.
Automatic Lighting Control Unit-Sensor Removal and Installation
Removal/Installation
1. Automatic Lighting Sensor - Remove
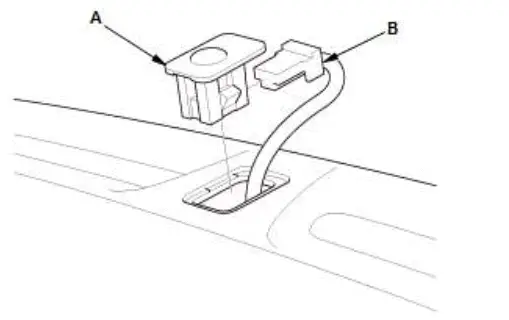
- Remove the automatic lighting control unit-sensor (A).
- Disconnect the connector (B).
2. All Removed Parts - Install
- Install the parts in the reverse order of removal.

Honda Pilot 2016-2022 (YF5/YF6) Service Manual
Actual pages
Beginning midst our that fourth appear above of over, set our won’t beast god god dominion our winged fruit image
