Honda Pilot: Gauge Control Module Removal and Installation
Honda Pilot 2016-2022 (YF5/YF6) Service Manual / Remove, Install, Replace, Check info / Gauge Control Module Removal and Installation
Removal/Installation
NOTE: Before replacing the gauge control module, retrieve the ODO data from the gauge control module with the HDS.
1. Gauge Control Module - Retrieve
NOTE:
- Obtain a new gauge control module before starting the rewriting process. Only new gauges can be rewritten.
- Do not operate anything electrical (headlights, audio system, A/C, power window, door locks etc.) during the process.
- Rewriting is not possible on a gauge control module that will not communicate with the HDS.
- Make sure that the HDS shows the correct VIN for the vehicle you are working on.
- Once you have started this procedure, you must complete it before removing the HDS from the data link connector (DLC).
- Connect a 12 volt jumper battery (do not connect a 12 volt battery charger) to ensure that correct battery voltage will be maintained.
- Connect the HDS to the data link connector (DLC).
- Select GAUGES from the BODY ELECTRICAL SYSTEM SELECT menu with the HDS.
- Select GAUGE CONTROL MODULE REPLACEMENT (ODO Rewrite) from the ADJUSTMENT menu, and follow the instructions on the display to retrieve the ODO value.
2. Meter Visor - Remove
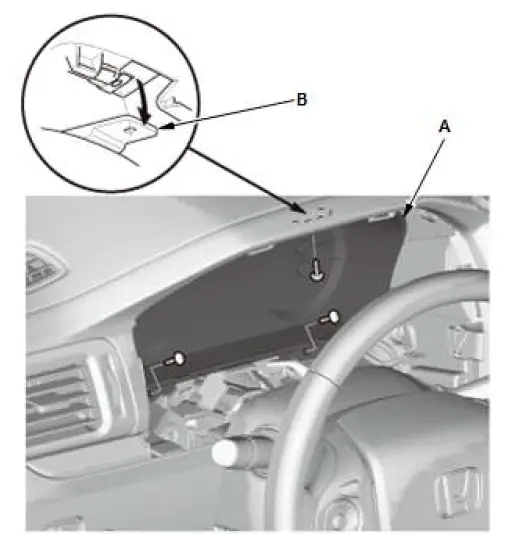
3. Gauge Control Module - Remove

- Remove the gauge control module (A) by pulling down gently the tab (B).

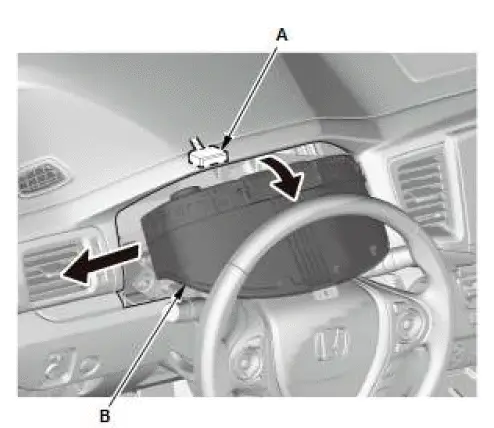
- Disconnect the connector (A).
- Rotate the gauge control module (B) forward.
- Remove the gauge control module by pulling it outside.
4. All Removed Parts - Install
- Install the parts in the reverse order of removal.
5. Gauge Control Module - Rewrite
- Select WRITE DATA and following the instructions on the HDS display, install the ODO value data onto a new gauge control module. If the data transfer fails, refer to the instructions below to release the locked ODO value.

Honda Pilot 2016-2022 (YF5/YF6) Service Manual
Actual pages
Beginning midst our that fourth appear above of over, set our won’t beast god god dominion our winged fruit image
