Honda Pilot: HFL Switch Removal and Installation
Honda Pilot 2016-2022 (YF5/YF6) Service Manual / Remove, Install, Replace, Check info / HFL Switch Removal and Installation
Removal/Installation
SRS components are located in this area. Review the SRS component locations and the precautions and procedures before doing repairs or service.
NOTE: The HFL-navigation voice control switch and the HFL switch are the same parts.
1. Steering Wheel Trim - Remove
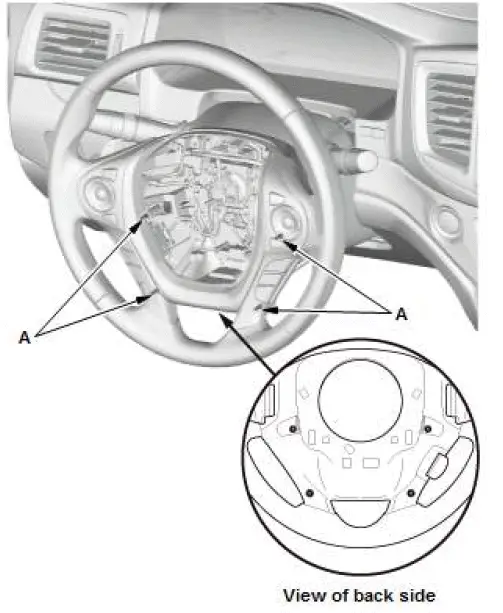
- Adjust the steering column to the full telescopic out position.
- Loosen the screws (A).
NOTE:
- Turn the steering wheel to the proper position to loosen the screws.
- The screws remains in the rear cover.
- Remove the driver's airbag.
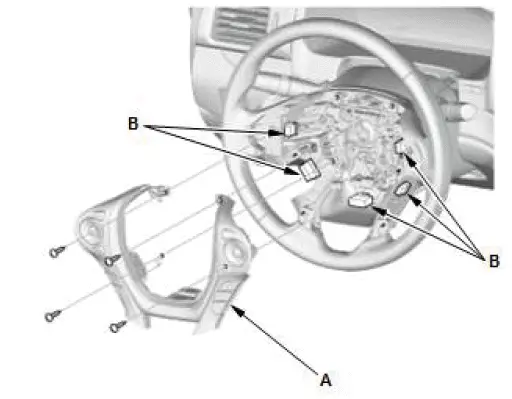
- Pull out the steering wheel trim (A), then disconnect the connectors (B).
- Remove the steering wheel trim.
2. HFL Switch - Remove
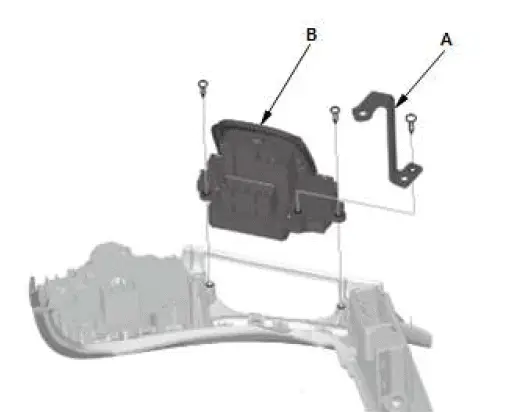
- Remove the set plate (A) and the HFL switch (B).
3. All Removed Parts - Install
- Install the parts in the reverse order of removal.

Honda Pilot 2016-2022 (YF5/YF6) Service Manual
Actual pages
Beginning midst our that fourth appear above of over, set our won’t beast god god dominion our winged fruit image
