Honda Pilot: Intelligent Traction Management Switch Test
Honda Pilot 2016-2022 (YF5/YF6) Service Manual / Parts Test Info / Intelligent Traction Management Switch Test
Removal/Installation
1. Center Console Panel - Remove
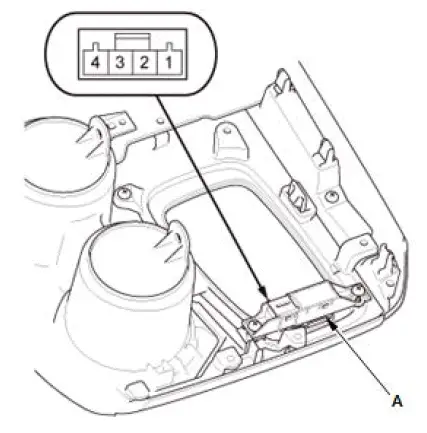
2. Intelligent Traction Management Switch - Test
6-speed A/T
9-speed A/T

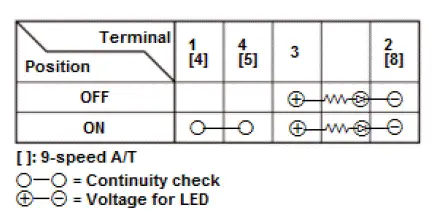
- Check for continuity between the terminals in each switch position according to the table.
NOTE:
- Make sure the correct test lead (+or -) is placed on the terminal.
- When checking for continuity across the diode, use the
diode setting (
 ) on the digital
volt/ohm meter to
check the diode bias.
) on the digital
volt/ohm meter to
check the diode bias. - Note this important operating characteristic; diode bias causes a diode to fully conduct electricity in one direction (forward), while not at all in the opposite direction (reverse).
- If the continuity is not as specified, replace the intelligent traction management switch (A).
3. All Removed Parts - Install
- Install the parts in the reverse order of removal.

Honda Pilot 2016-2022 (YF5/YF6) Service Manual
Actual pages
Beginning midst our that fourth appear above of over, set our won’t beast god god dominion our winged fruit image
