Honda Pilot: Shift Cable Removal and Installation
Removal
SRS components are located in this area. Review the SRS component locations and the precautions and procedures before doing repair or service.
1. Vehicle - Lift
2. Center Console - Remove
3. Shift Cable (Shift Lever Side) - Remove

- Shift the shift lever to R.
- Insert a 6.0 mm (0.236 in) pin (A) into the positioning holes
(B).
NOTE: Use only a 6.0 mm (0.236 in) pin with no burrs.
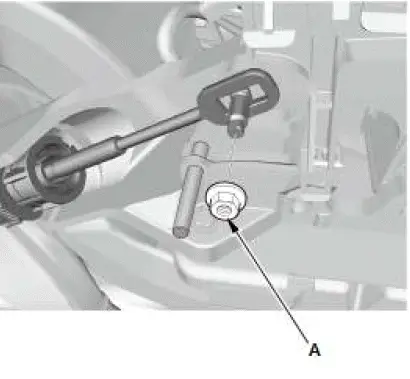
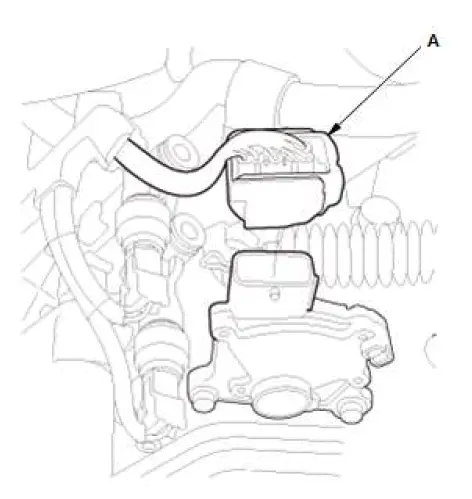
- Remove the shift cable end nut (A).
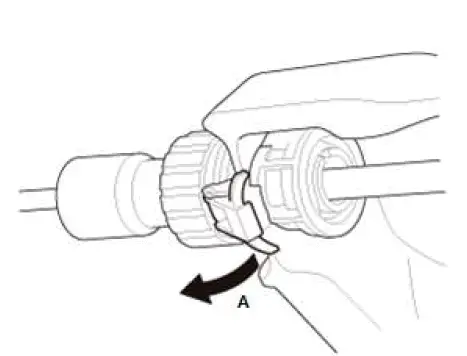
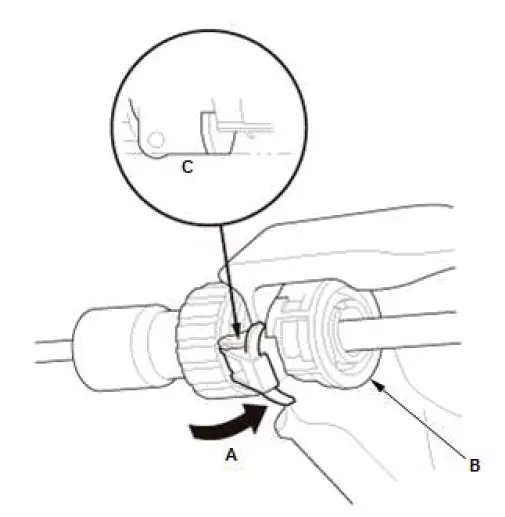
- Unlock the retainer lock (A).
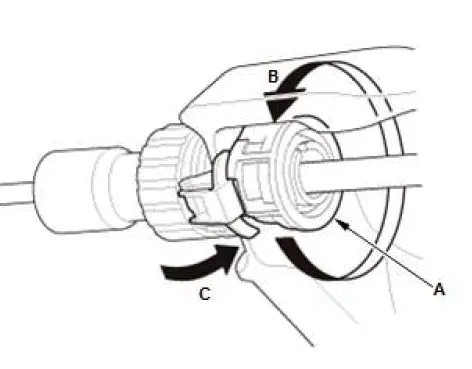
- Rotate the socket holder retainer (A) counterclockwise (B) until it stops.
- Push the retainer lock (C) into the socket holder retainer to lock the retainer.
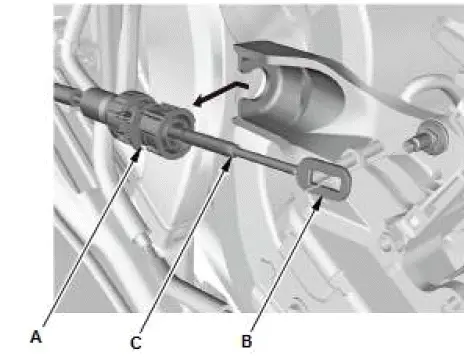
- Slide the socket holder (A) away as shown to remove the
shift cable (B).
NOTE: Do not remove the shift cable by pulling the shift cable guide (C).
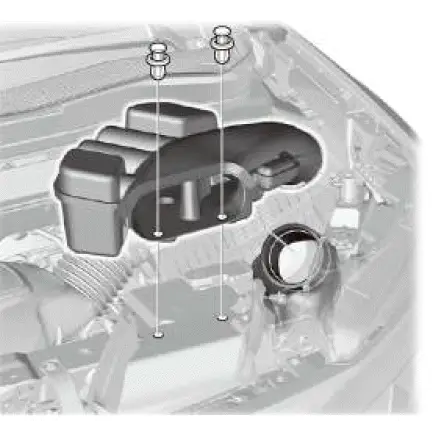
5. Air Intake Tube - Remove
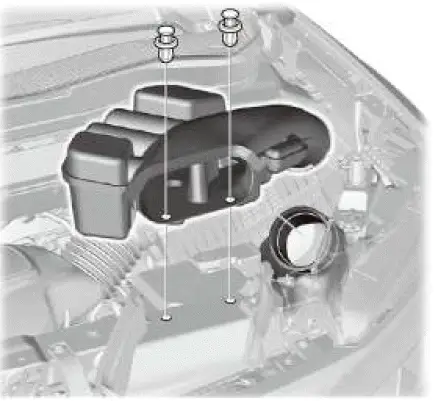
6. Air Cleaner - Remove
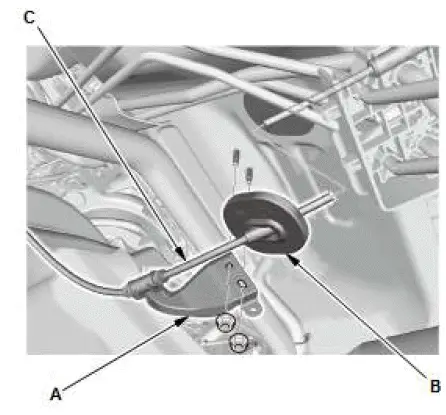
7. Shift Cable (Transmission Side) - Remove
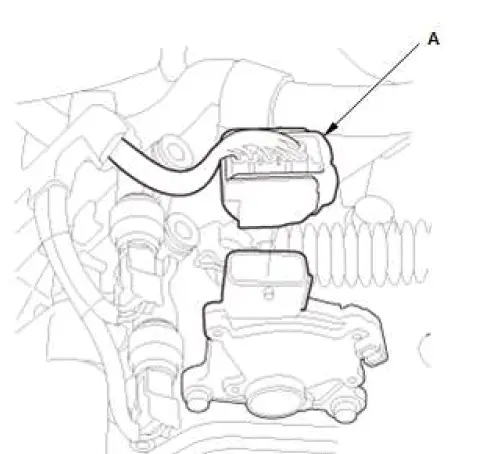
- Disconnect the connector (A).
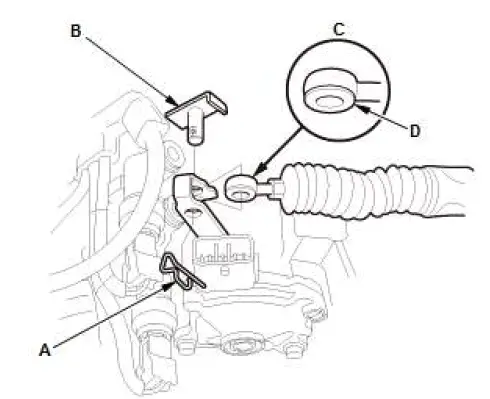
- Remove the lock pin (A) and the control pin (B).
- Remove the shift cable end (C).
- Check the bushing (D) in the shift cable end for proper fit and wear. If the bushing is loose or worn, replace the shift cable.
- Remove the shift cable bracket (A).
8. Engine Undercover - Remove
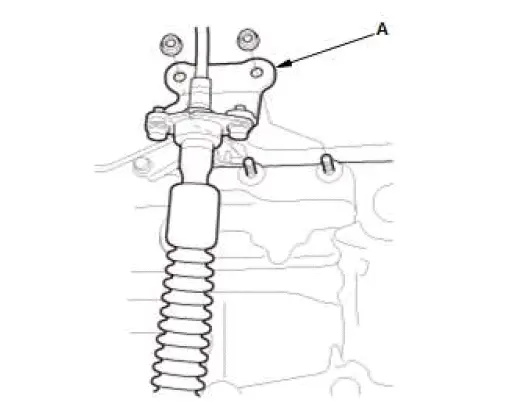
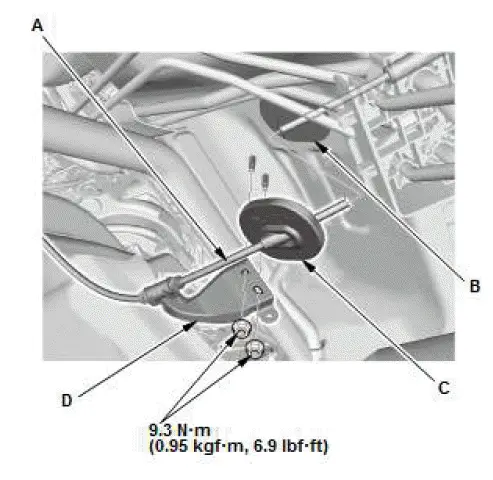
9. Shift Cable - Remove
- Remove the shift cable bracket (A).
- Remove the shift cable grommet (B), and pull out the shift
cable (C).
NOTE: Do not bend the shift cable excessively.
Installation
SRS components are located in this area. Review the SRS component locations and the precautions and procedures before doing repair or service.
1. Shift Cable - Install
- Insert the shift cable (A) through the grommet hole (B).
NOTE: Do not bend the shift cable excessively.
- Install the shift cable grommet (C).
- Install the shift cable bracket (D).
2. Engine Undercover - Install
3. Shift Cable (Transmission Side) - Install
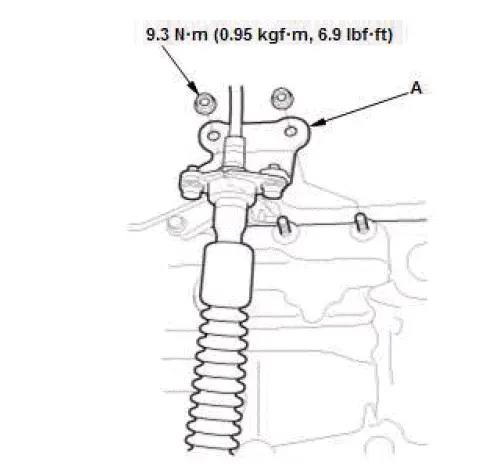
- Install the shift cable bracket (A).
- Apply molybdenum grease to the hole in the bushing (A) in the shift cable end (B).
- Install the shift cable end.
- Install the control pin (C), and secure the control pin with the lock pin (D).
- Connect the connector (A).
4. Air Cleaner - Install
5. Air Intake Tube - Install
6. Front Bulkhead Cover - Install
7. Shift Cable - Adjust

- Push the shift cable (A) until it stops, then release it.
NOTE: Do not hold the shift cable guide (B) to adjust the shift cable.
- Pull the shift cable back one step from the P position so that the shift position is in R.
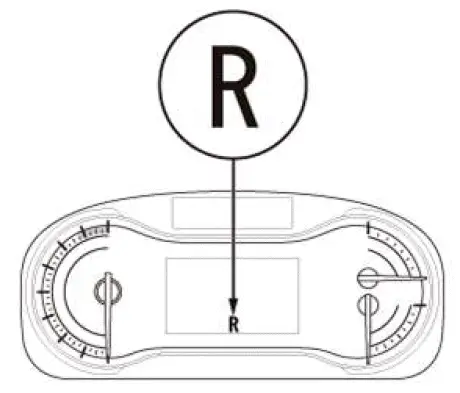
- Turn the vehicle to the ON mode.
- Check that the R position indicator comes on.
- Turn the vehicle to the ACCESSORY mode.
8. Shift Cable (Shift Lever Side) - Install
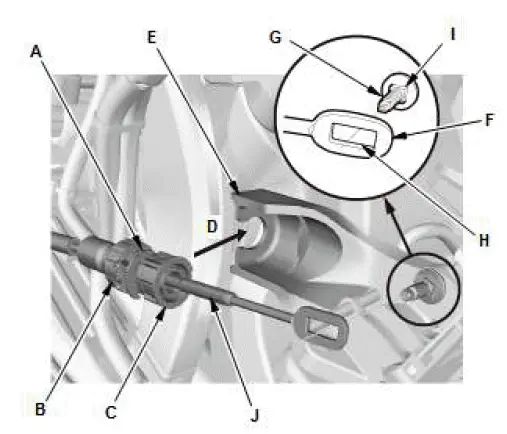
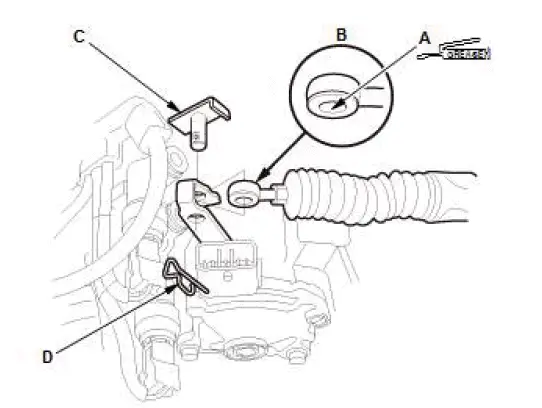
- Align the shift cable slot (A) between the socket holder (B) and the socket holder retainer (C) with the opening (D).
- Slide the socket holder into the shift cable bracket (E) while installing the shift cable end (F) over the mounting stud (G) by aligning its square hole (H) with the square fitting (I) at the bottom of the stud.
NOTE:
- Do not install the shift cable by holding the shift cable guide (J).
- When the socket holder is installed in the shift cable bracket, the retainer lock is unhinged and releases the holder retainer lock, then the holder retainer returns under spring force to secure the shift cable.
- Push the retainer lock (A) fully to lock the socket holder retainer (B), and make sure that the retainer lock fits into the hinged-joint (C). If the retainer lock does not fit with the edge of the hinged-joint, rotate the holder retainer counterclockwise while pushing the retainer lock until it locks.
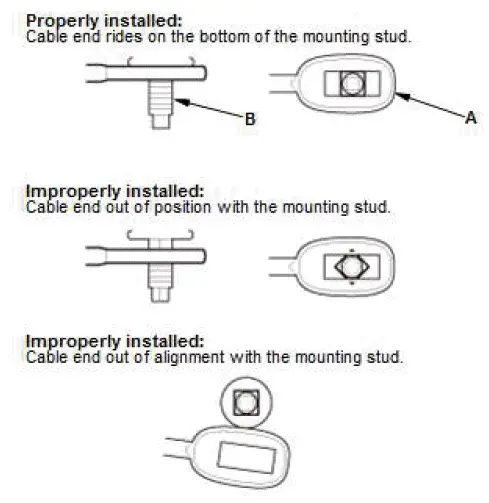
- Make sure that the shift cable end (A) is properly installed
on the mounting stud (B).
- If the cable end is out of position with the mounting stud, remove the shift cable from the shift cable bracket, then reinstall the cable end over the mounting stud before reinstalling the shift cable to the shift cable bracket. Do not install the shift cable end on the mounting stud with the shift cable installed on the shift cable bracket.
- If the shift cable end does not ride at the bottom of the mounting stud, rotate the stud to align the square fitting with the hole.
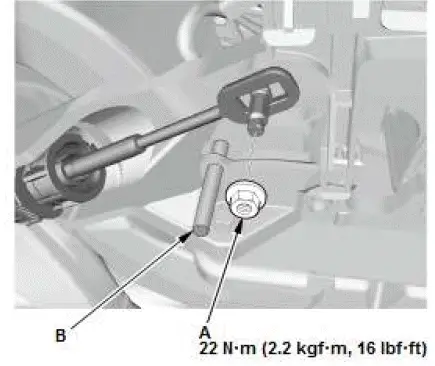
- Install the shift cable end nut (A).
- Remove the 6.0 mm (0.236 in) pin (B) that was installed to hold the shift lever.
9. Shift Cable - After Install Check
- Turn the vehicle to the ON mode.
- Move the shift lever to each position, and check that the A/T gear position indicator follows the shift lever operation.
- Shift the shift lever to P.
- Check that the shift lock works properly.
- Push the shift lock release, and check that the shift lever releases. Also check that the shift lever locks when it is shifted back to P.
10.Center Console - Install

Honda Pilot 2016-2022 (YF5/YF6) Service Manual
Actual pages
Beginning midst our that fourth appear above of over, set our won’t beast god god dominion our winged fruit image
