Honda Pilot: Transfer Assembly Removal and Installation
Removal
1. Vehicle - Lift
2. Engine Undercover - Remove
3. ATF - Drain
4. Transfer Assembly Fluid - Drain
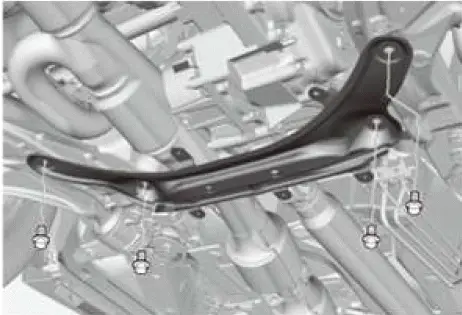
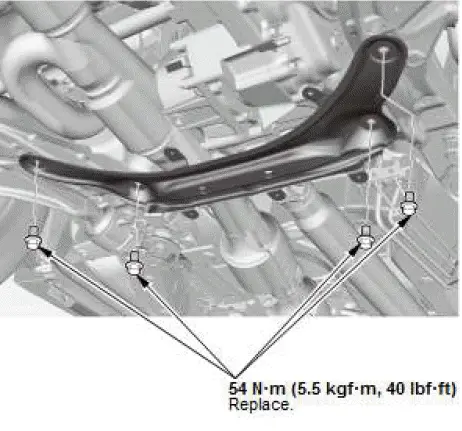
5. Front subframe stiffener plate - Remove
6. Under-Floor TWC - Remove
7. Propeller Shaft - Remove
8. Transfer Assembly - Remove
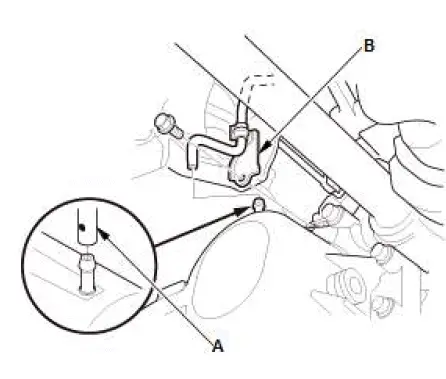
- Disconnect the breather hose (A).
- Remove the transfer breather hose bracket (B).
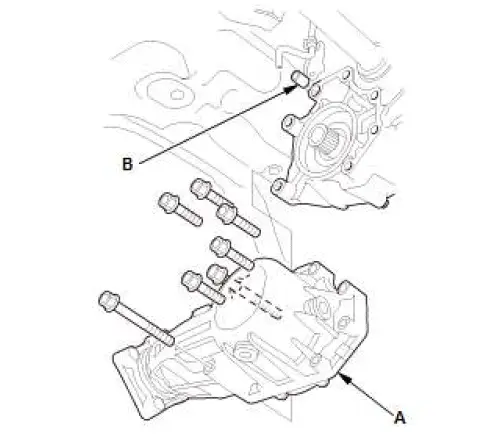
- Remove the transfer assembly (A) with the dowel pin (B).
Installation
1. Transfer Assembly - Install
- Clean the areas where the transfer assembly contacts the
transmission with solvent, and dry with compressed air.
Then apply ATF to the contact area.
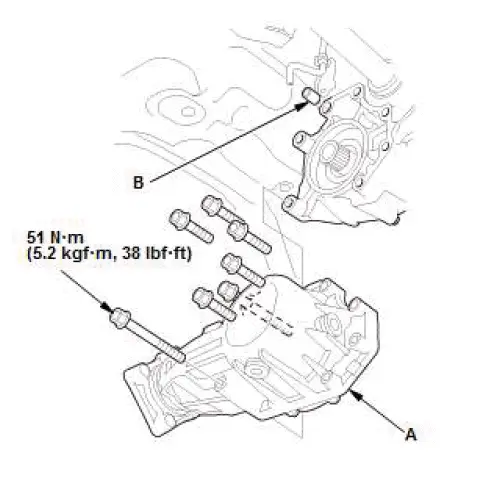
- Install the transfer assembly (A) with the dowel pin (B).
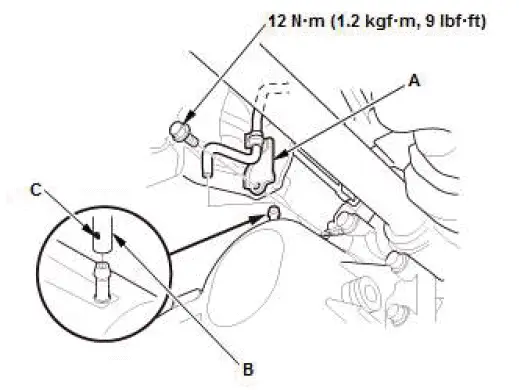
- Install the transfer breather hose bracket (A).
- Connect the breather hose (B) with facing the dot mark (C) to the rear side of the vehicle.
- Refill the transfer assembly with the recommended transfer fluid, if necessary.
2. Propeller Shaft - Install
3. Under-Floor TWC - Install
4. Front subframe stiffener plate - Install
5. Engine Undercover - Install
6. Transfer Assembly Fluid - Refill
7. ATF - Refill
Transfer Assembly Removal and Installation
Removal
1. Vehicle - Lift
2. Engine Undercover - Remove
3. Transfer Assembly Fluid - Drain
4. Front Subframe Stiffener - Remove
5. Under-Floor TWC - Remove
6. Propeller Shaft - Remove
7. Transfer Assembly - Remove
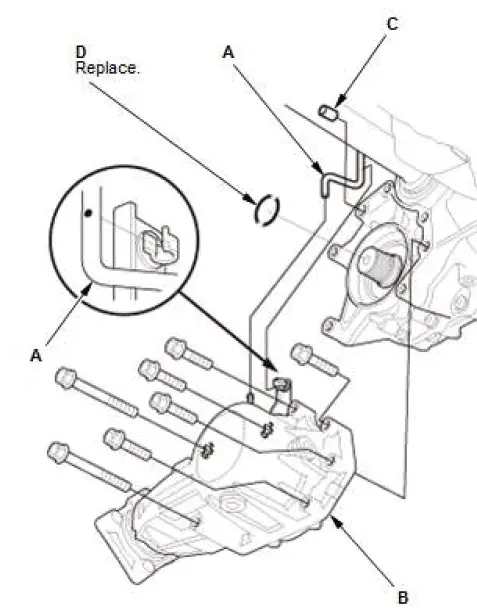
- Disconnect the breather hose (A).
- Remove the transfer assembly (B) with the dowel pin (C).
- Remove the O-ring (D).
Installation
1. Transfer Assembly - Install
- Clean the areas where the transfer assembly contacts the transmission with solvent, and dry with compressed air.
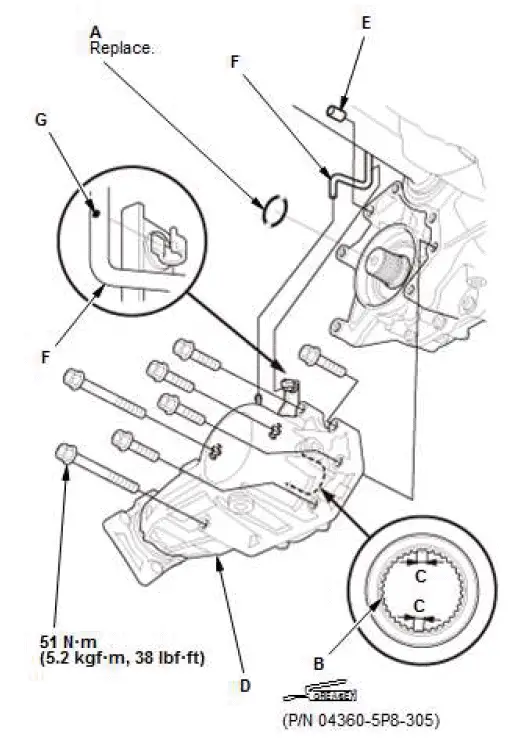
- Install a new O-ring (A).
- Apply 1.9-2.9 g (0.067-0.102 oz) of Honda SPLINE WR GREASE (P/N 04360-5P8-305) to the transfer shaft splines (B) as shown.
- After applying grease, remove the grease from the splined grooves (C) so that air can bleed from the transfer shaft.
- Install the transfer assembly (D) with the dowel pin (E).
- Connect the breather hose (F) with aligning the paint mark (G) to the bracket.
- Refill the transfer assembly with the recommended transfer assembly fluid, if necessary.
2. Propeller Shaft - Install
3. Under-Floor TWC - Install
4. Front Subframe Stiffener - Install
5. Transfer Assembly Fluid - Refill
6. Engine Undercover - Install

Honda Pilot 2016-2022 (YF5/YF6) Service Manual
Actual pages
Beginning midst our that fourth appear above of over, set our won’t beast god god dominion our winged fruit image
