Honda Pilot: Warm Up TWC Removal and Installation
Removal/Installation
Front Bank (Bank 2)
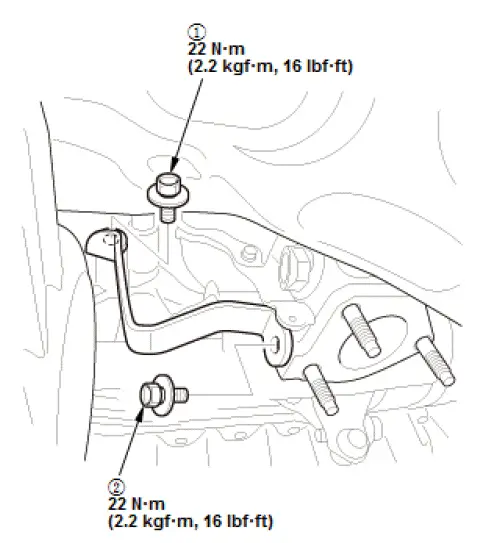
1. Front WU-TWC Bracket - Loosen
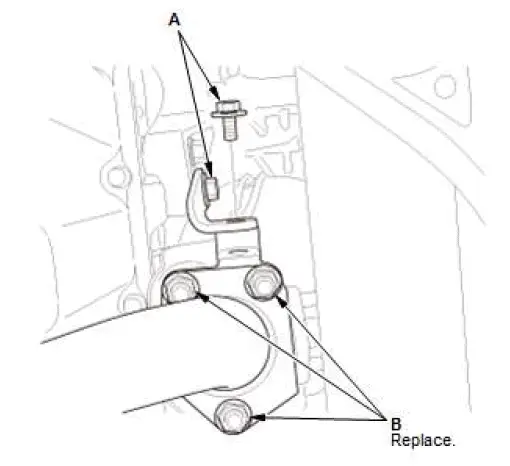
- Loosen or remove the front WU-TWC bracket mounting bolts (A).
- Remove the self-locking nuts (B).
2. Engine Cover - Remove
3. EGR Pipe A - Remove
4. Front A/F Sensor (Sensor 1) - Remove
5. A/C Condenser Fan Shroud Assembly - Remove
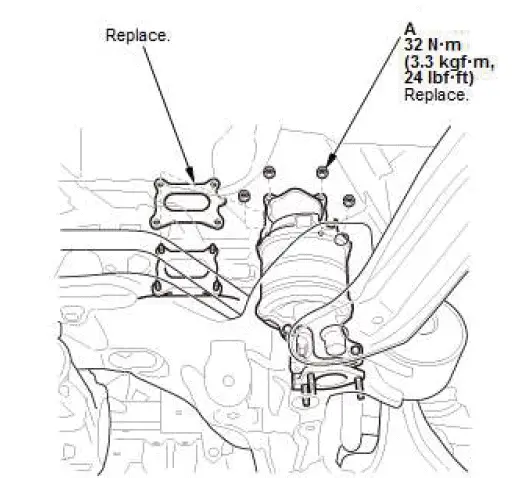
6. Front WU-TWC - Remove
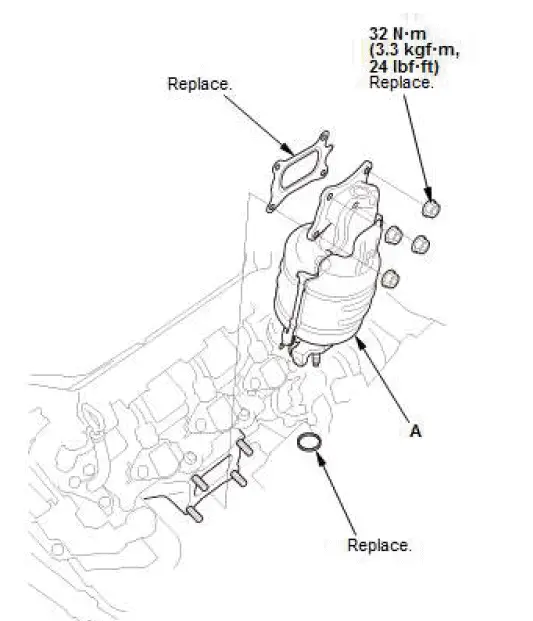
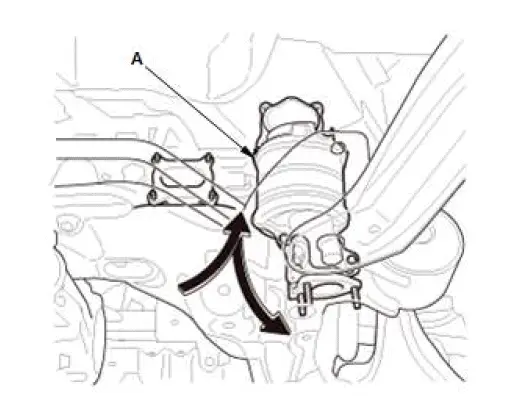
- Carefully remove the front WU-TWC (A) assembly.
7. WU-TWC Covers - Remove

8. All Removed Parts - Install
- Install the parts in the reverse order of removal with new gaskets and new self-locking nuts.
NOTE:
- Before installing the WU-TWC, install the WU-TWC covers.
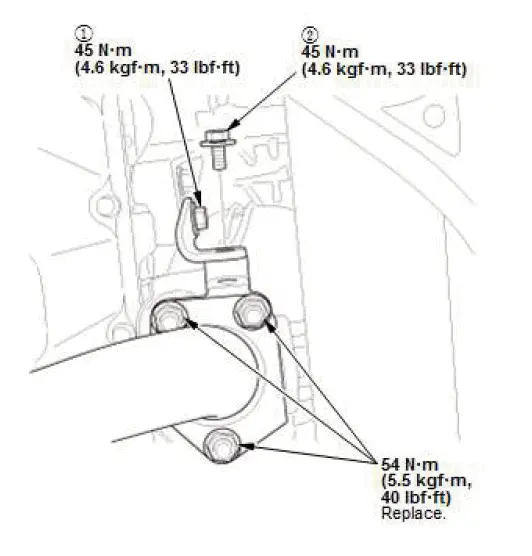
- Tighten the WU-TWC bracket mounting bolts in the numbered sequence shown.
Removal/Installation
Rear Bank (Bank 1)
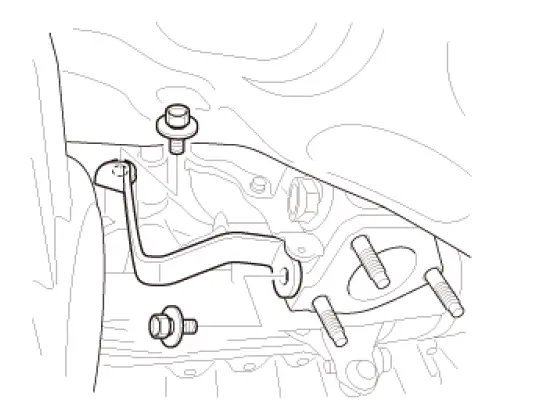
1. Stabilizer Link - Remove
- Remove the right side stabilizer link.
2. Under-Floor TWC - Remove
3. Rear A/F Sensor (Sensor 1) - Remove
4. Rear Secondary HO2S (Sensor 2) - Remove
5. Rear WU-TWC Bracket - Remove
6. Rear Engine Mount Heat Shield - Remove
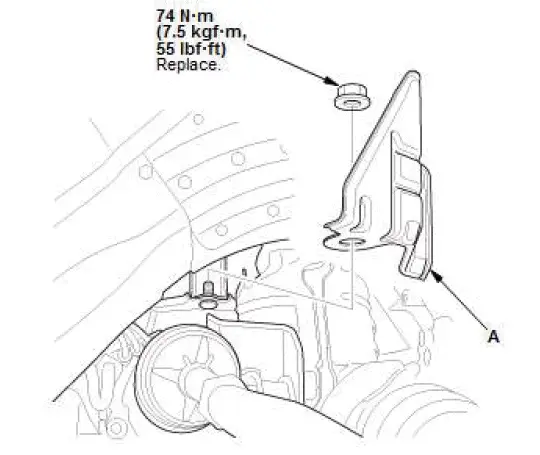
- Remove the rear engine mount heat shield (A).
7. Power Steering Heat Shield - Remove
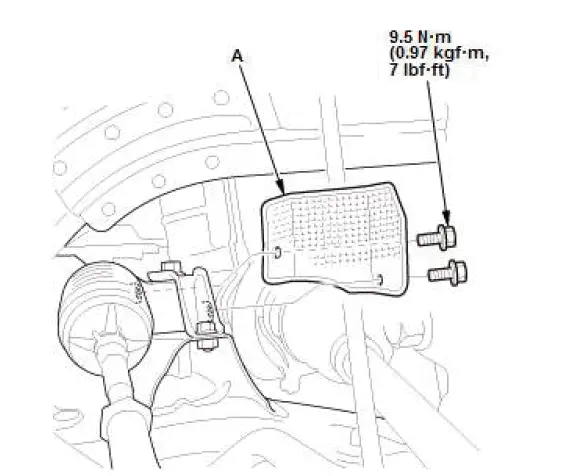
- Remove the power steering heat shield (A).
8. Rear WU-TWC - Remove
- Remove the nuts (A).
- Turn the WU-TWC (A) as shown.
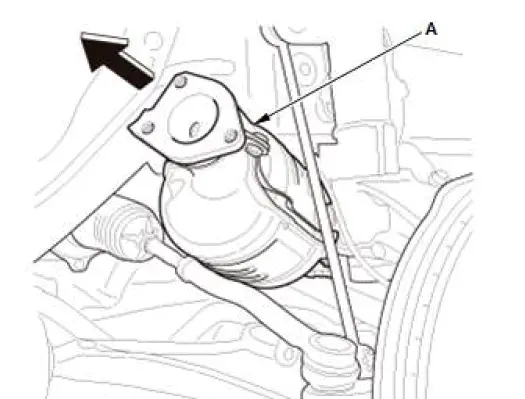
- Turn the WU-TWC (A), then take it out by turning it as shown.
9. WU-TWC Covers - Remove
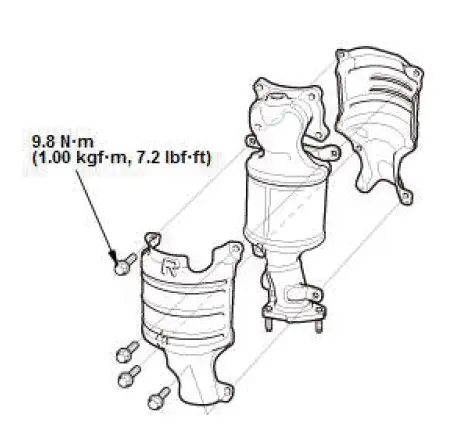
10.All Removed Parts - Install
- Install the parts in the reverse order of removal with new gaskets and new self-locking nuts.
NOTE:
- Before installing the WU-TWC, install the WU-TWC covers.
- Tighten the WU-TWC bracket mounting bolts in the numbered sequence shown.

Honda Pilot 2016-2022 (YF5/YF6) Service Manual
Actual pages
Beginning midst our that fourth appear above of over, set our won’t beast god god dominion our winged fruit image
