Honda Pilot: Windshield Side Trim Removal and Installation
Honda Pilot 2016-2022 (YF5/YF6) Service Manual / Remove, Install, Replace, Check info / Windshield Side Trim Removal and Installation
Removal
1. Windshield Side Trim - Remove
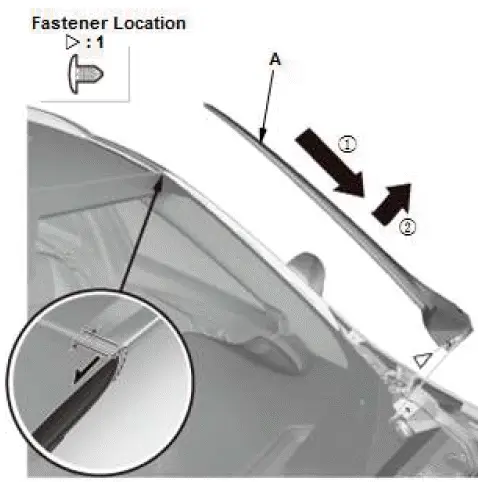
- Remove the clip.
- Slide the windshield side trim (A) as shown, and remove it.
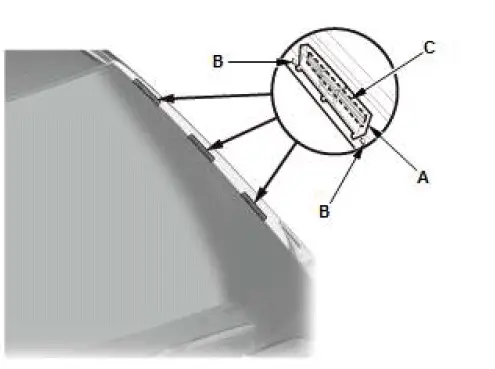
- If necessary, remove the clip (A) from the windshield side trim (B).
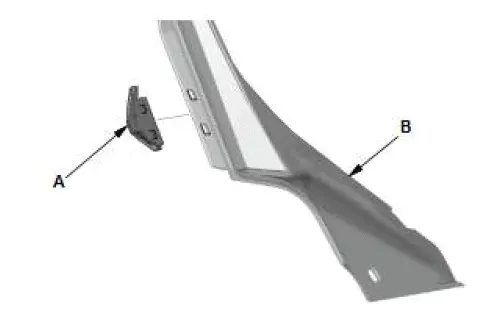
2. Retainer - Remove
- Gradually separate the adhesive (A) under the retainers (B) while heating them with a heat gun to about 212―248ºF (100―120ºC).
NOTE:
- Do not overheat the painted surface around the retainers.
- To keep the exterior plastic parts near the A-pillar from being overheated by a heat gun, wrap them with an aluminum foil.
Installation
1. Retainer - Install
- Clean the body bonding surface with a shop towel dampened with isopropyl alcohol. After cleaning, keep oil, grease, and water from getting on the clean surface.
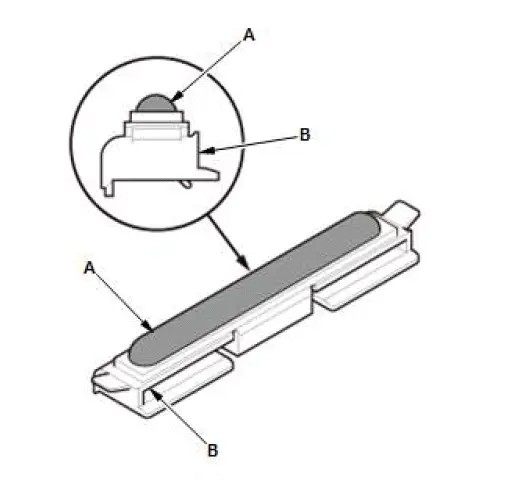
- Apply the two-part epoxy adhesive (A) on the clip (B) as shown.
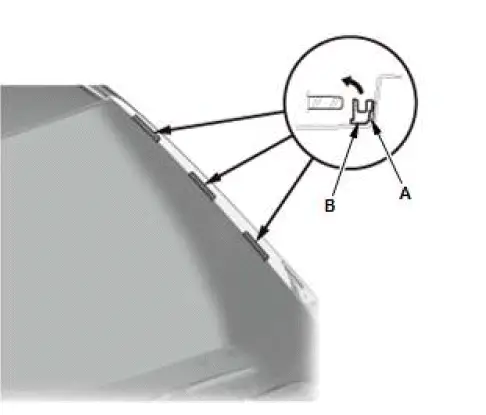
- Line up the retainers (A) with the alignment marks (B) on the body, and then press the adhesive portion (C) into place securely.
- Wait for adhesive to dry.
NOTE: Refer to the adhesive manufacturer's instructions in dry time.
2. Windshield Side Trim - Install
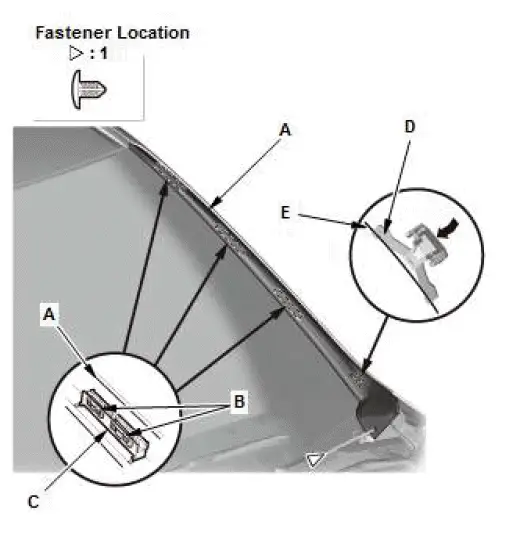
- Install the windshield side trim (A).
NOTE:
- Install the hooks (B) of the windshield side trim to the retainers (C).
- Install the clip arm (D) of the trim in under of the windshield (E).
- Install the clip.

Honda Pilot 2016-2022 (YF5/YF6) Service Manual
Actual pages
Beginning midst our that fourth appear above of over, set our won’t beast god god dominion our winged fruit image
