Honda Pilot: Blower Unit Removal and Installation
Removal/Installation
SRS components are located in this area. Review the SRS component locations and the precautions and procedures before doing repairs or service.
1. Glove Box - Remove
2. Stereo Amplifier - Remove (For Some Models)
3. Passenger's Heater Duct B - Remove
4. ANC/Active Sound Control Unit - Remove
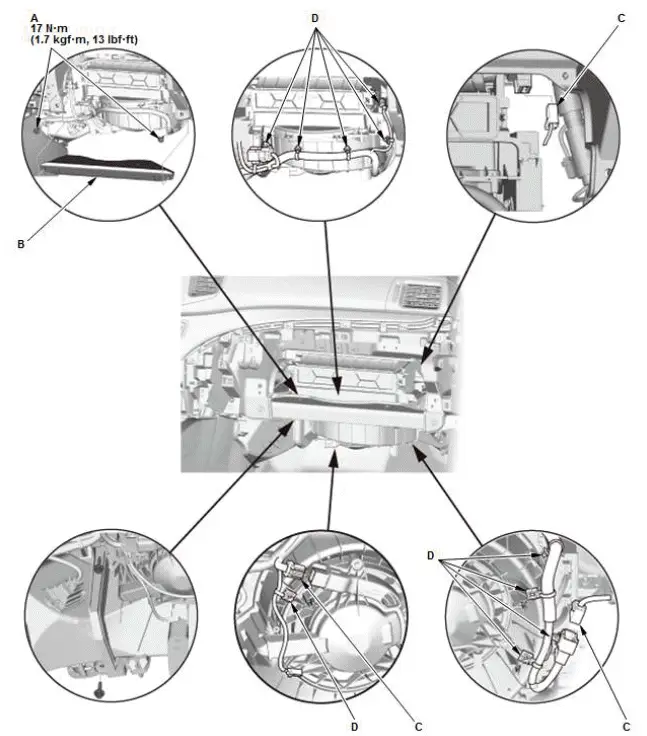
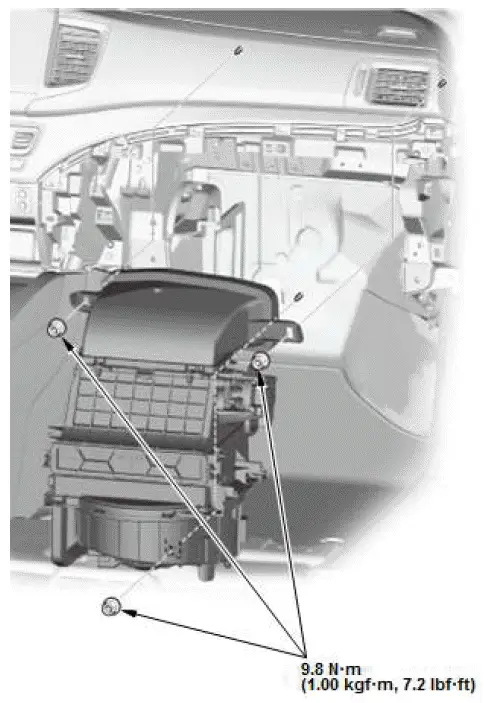
5. Blower Unit - Remove
- Using a TORX E8 bit, remove the TORX bolts (A).


- Remove the blower unit.
6. All Removed Parts - Install
- Install the parts in the reverse order of removal.
NOTE: If the bolt threads of the steering hanger beam are stripped, replace the bolts with one-size larger bolts (available as a service part), which are specifically designed to tighten the instrument panel to the specified torque setting.
Body Electrical Troubleshooting - B-CAN System Diagnosis Test Mode A - Initial Communication and DTC Checks
Check the PCM for DTCs and troubleshoot PCM or F-CAN loss of communication errors first, then do this diagnosis if the symptom is related to the B-CAN system.
1. Compare the symptom with this list of B-CAN related systems:
- Gauge control module
- Exterior lights
- Turn signals
- Entry light control
- Interior lights
- Safety indicators
- Horns (security and panic)
- Reminder chimes (seat belt, lights-on, and parking brake)
- Power window/moonroof timer
- Wiper/washer
- Security
- Keyless entry
- Key interlock
- Power door locks
- Dashlights brightness
- Immobilizer
- Daytime running lights
- Driving position memory system
- Keyless access control
- Climate control
- BSI system
- Seat heater
- If the symptom is related to the B-CAN, go to step 2.
- If the symptom is not related to the B-CAN, go to the system symptom troubleshooting.■
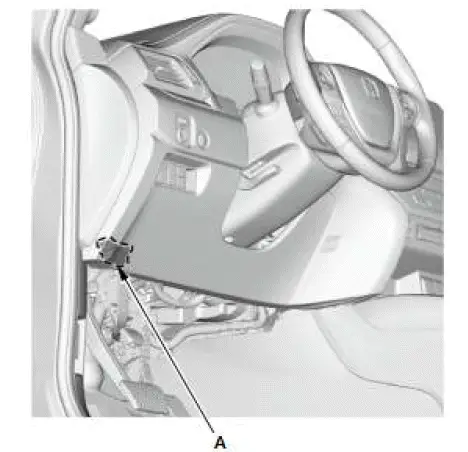
2. Connect the HDS to the data link connector (DLC) (A), then turn the vehicle to the ON mode.

3. From the BODY ELECTRICAL SYSTEM SELECT menu, select B-CAN CONTROL UNITS INFORMATION, and then select CHECK CONNECTED CONTROL UNITS listed to see if the following control units are communicating with the HDS.
- MICU
- Climate control unit
- Automatic lighting/rain sensor*1
- Automatic lighting control unit-sensor*2
- Keyless access/TPMS control unit
- Door multiplex control unit
- Headlight leveling control unit
- Power seat control unit
- Parking and back-up sensor control unit
- Power tailgate control unit
- Left side BSI radar unit
- Right side BSI radar unit
- Ventilated seat control unit
- Second row seat heater control unit
*1: With automatic wiper
*2: Without automatic wiper
NOTE:
- If a unit is communicating with the HDS, "DETECT" is displayed.
- If a unit is not communicating or the vehicle is not equipped, "NOT AVAILABLE" is displayed.
- The HDS only checks the status one time when BODY ELECTRICAL is selected. To recheck the status after repair, reboot the HDS.
- If all control units are communicating with the HDS, go to step 4.
- If any of the control units are not communicating, go to B-CAN System Diagnosis Test Mode B.
- If all units are not communicating or only the MICU is communicating, go to MICU DTC U1280 troubleshooting.
4. Select the system that has the problem from the BODY ELECTRICAL SYSTEM SELECT menu, then select DTCs.
- If any DTCs are indicated, go to step 5.
5. Record all DTCs, and sort them by DTC type, then troubleshoot them in this order:
- Internal error DTCs.
- Loss of communication DTCs.
- Signal error DTCs.

Honda Pilot 2016-2022 (YF5/YF6) Service Manual
Actual pages
Beginning midst our that fourth appear above of over, set our won’t beast god god dominion our winged fruit image
