Honda Pilot: BSI Radar Unit Aiming Inspection
Adjustment
NOTE: Inspect the BSI radar unit aiming in these instances:
- After replacing or removing and reinstalling one or both of the BSI radar units.
- After repairing the body panel(s) where the BSI radar unit(s) mount.
- For any of the following DTCs:
- B18B8: Left Side BSI Radar Unit Azimuth Off Alignment
- B1E68: Right Side BSI Radar Unit Azimuth Off Alignment
- Park the vehicle on level ground (within 1 degree of slope) with at least 4 m (13 ft) of space on both sides and behind the vehicle. Do not do this procedure with the vehicle on a lift or with the tires on steel plates or rollers.
- Keep the front wheels in the straight ahead position.
- When marking on the floor, use suitable tape to mark the exact locations.
1. Rear Bumper - Remove
2. BSI Radar Unit Cover - Remove
NOTE: Reinstall the BSI radar unit after removing the BSI radar unit cover.
3. BSI Radar Unit Aiming - Inspect
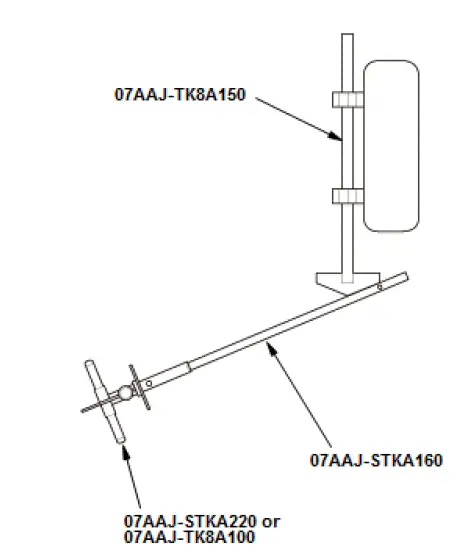
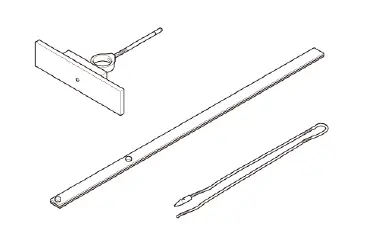
Prepare the items shown:
- Felt-tip pen
- Tape
This illustration left of the vehicle is shown; right of the vehicle is symmetrical.
Before Inspection:
- Clean the surface of the BSI radar unit.
- Make sure the vehicle does not have aftermarket suspension.
- Make sure that all of the tires are the correct size and inflated to the proper pressure.
- Make sure the fuel tank is full.
- Remove all cargo from the vehicle except the tool kit.
- Make sure the steering wheel is pointed straight ahead, and do not turn it after setting the vehicle.
- Shift the transmission to P position, and the parking brake applied.
This illustration left of the vehicle is shown; right of the vehicle is symmetrical.
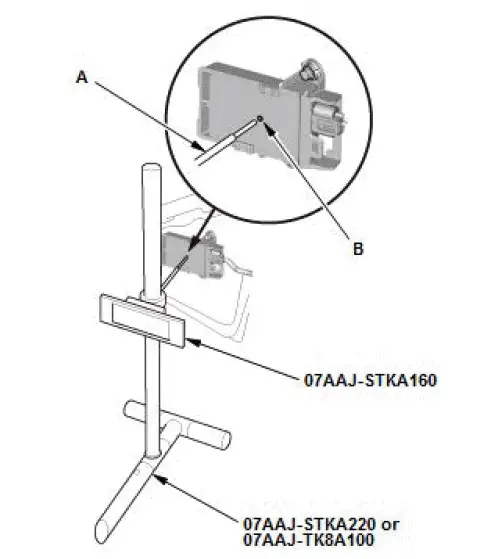
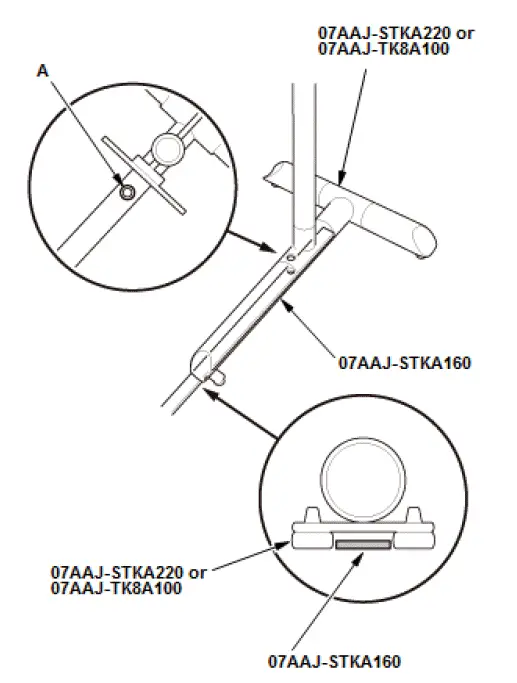
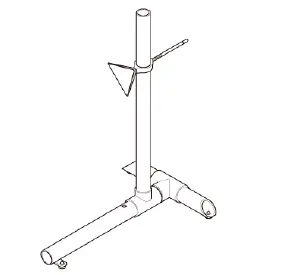
- Set the target on the stand.
- Set the tip (A) of the target at the same height as the center (B).
This illustration left of the vehicle is shown; right of the vehicle is symmetrical.
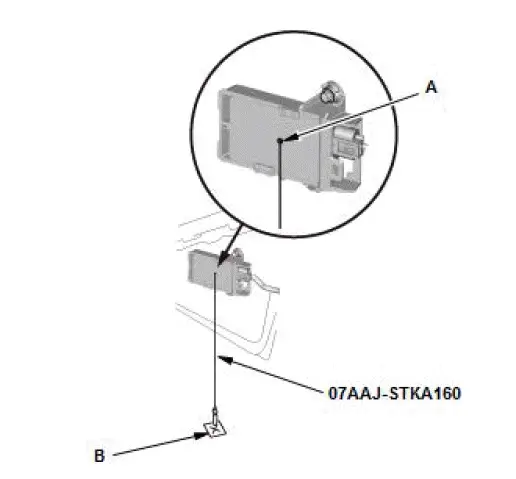
- Hold the plumb line against the center (A) on the BSI radar unit, and lower the plumb bob until it touches the floor.
- Mark the floor at that point (B).
This illustration left of the vehicle is shown; right of the vehicle is symmetrical.
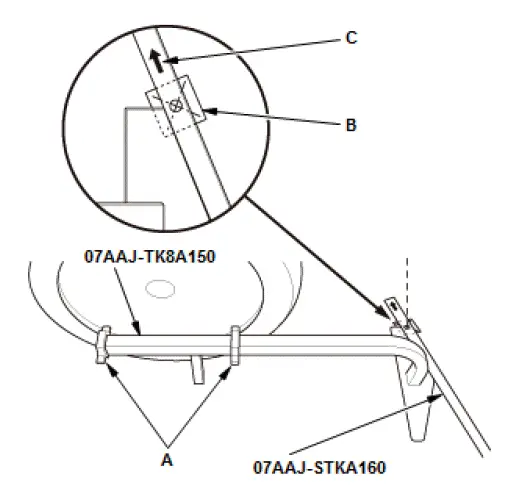
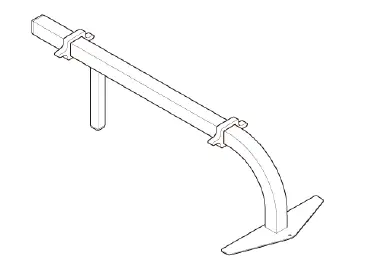
- Place the rim frame by the rear wheel on the side of the
vehicle you are aiming. Adjust the spacers (A) to fit against
the wheel rim to make the rim frame is parallel with the
wheel.
NOTE: Make sure the spacers are touching the wheel rim.
- Assemble the two sections of the straightedge, then place
the hole in the end of the straightedge over the mark (B) on
the ground that you made in step 4. Slide the rim frame
rearward until the base of the rim frame and the
straightedge meet.
NOTE: Set the straightedge according to the arrow (C).
- Place the target over the other end of the straightedge, and align the hole (A) in the base of the target with the hole in the end of the straightedge.
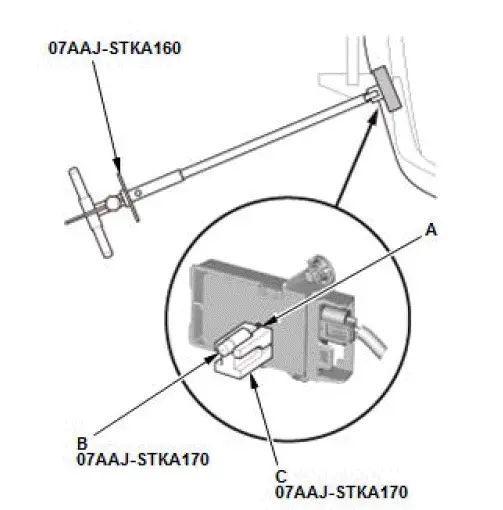
This illustration left of the vehicle is shown; right of the vehicle is symmetrical.
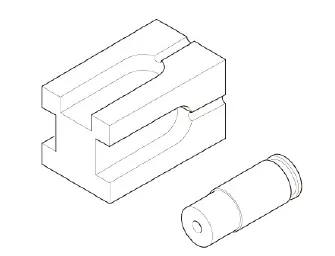
- With the appropriate degree setting on the angle gauge up,
set the angle gauge against the radar unit. Align the cutout
in the angle gauge with the center (A) on the radar unit.
Face up the surface of the angle gauge that says zero degrees and place the gauge next to the radar as shown.
CAUTION
Do not aim the laser beam at anyone's eyes.
- Turn on the laser pointer (B), and set it on the angle gauge (C) so that the beam hits on the target.
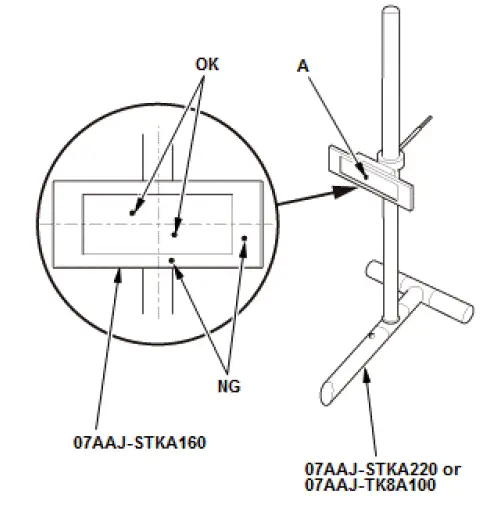
- Check the point (A) where the laser beam hits the target:
- If the laser beam is within the target, the BSI radar unit is aimed properly.
- If the laser beam is out of the target range, check the BSI radar unit mounting area.
4. BSI Radar Unit Cover - Install
NOTE: Install the BSI radar unit cover after removing the BSI radar unit.
5. Rear Bumper - Install
Special Tool Required
- Rim Frame 07AAJ-TK8A150
- Target Set 07AAJ-STKA160
- Angle Gauge 07AAJ-STKA170
- Stand Set 07AAJ-STKA220*
*: Use Stand 07AAJ-TK8A100 or Stand Set 07AAJ-STKA220 for aiming.

Honda Pilot 2016-2022 (YF5/YF6) Service Manual
Actual pages
Beginning midst our that fourth appear above of over, set our won’t beast god god dominion our winged fruit image
