Honda Pilot: Driver's Power Seat Motor Test
Test
SRS components are located in this area. Review the SRS component locations and the precautions and procedures before doing repairs or service.
1. Driver's Seat Recline Cover - Remove
NOTE: If you are removing the driver's seat recline cover, you do not need to remove the driver's seat.
2. Driver's Power Seat Motor - Test
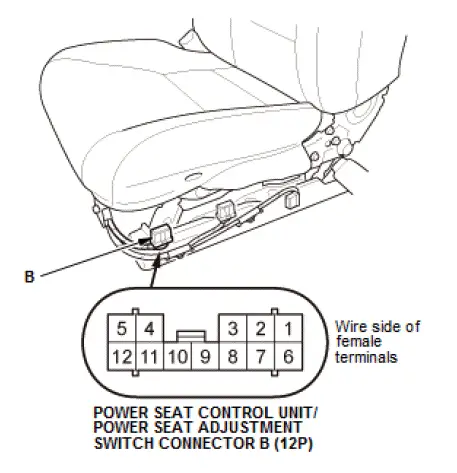
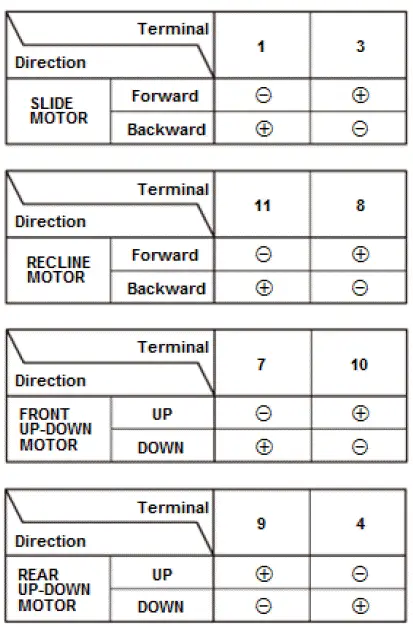
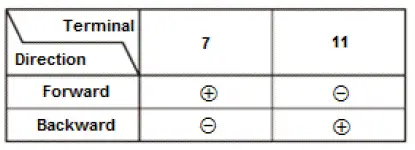
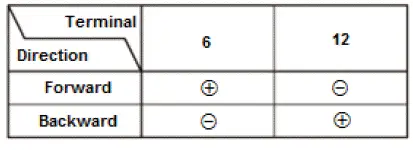
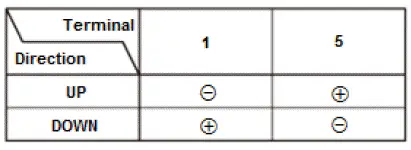
- Test the motor by applying power and ground at the power seat control unit/power seat adjustment switch connector B on the seat harness according to the table. When the motor stops running, disconnect 12 volt battery power immediately.
- If the motor does not run or fails to run smoothly, remove the driver's seat, go to step 3.
- Remove the driver's seat-back cover/pad as needed.
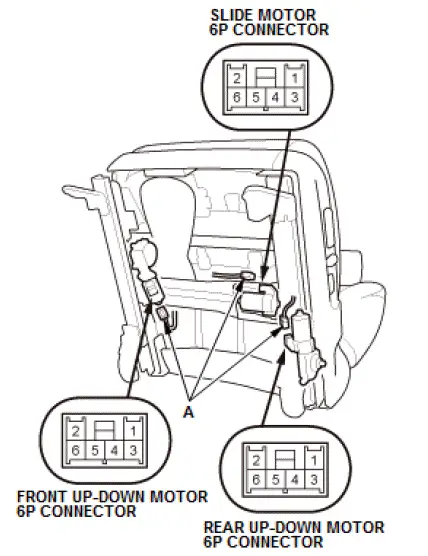
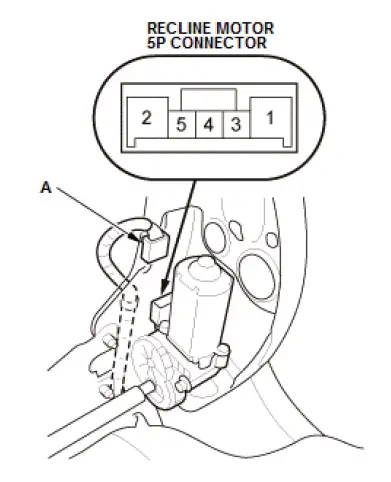
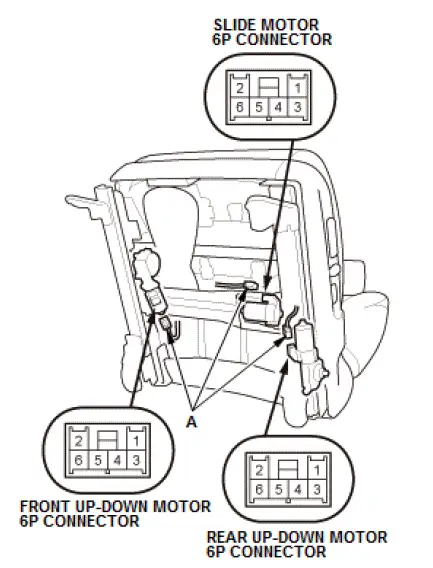
- Disconnect the connector(s) (A).
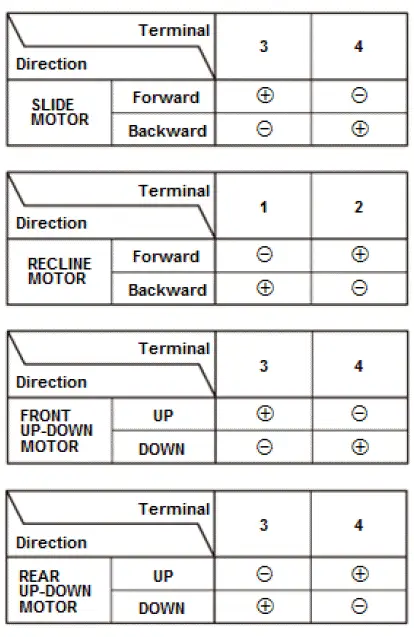
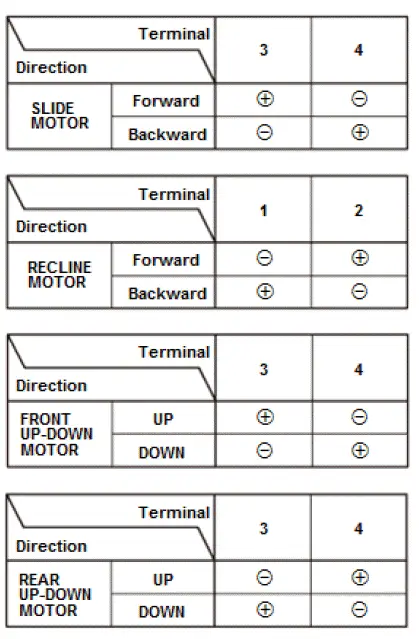
- Test each motor in each direction by connecting power and ground according to the table. When the motor stops running, disconnect 12 volt battery power immediately.
- If the motor does not run or fails to run smoothly, replace:
NOTE: All motors are part of the seat frame.
- Slide motor/seat frame
- Front up-down motor/seat frame
- Rear up-down motor/seat frame
- Recline motor/seat frame
If the motor runs smoothly, replace the driver's seat wire harness.
3. All Removed Parts - Install
- Install the parts in the reverse order of removal.
4. Driving Position Memory - Clear
- After testing, clear the driving position memory.
Driver's Power Seat Motor Test
Test
SRS components are located in this area. Review the SRS component locations and the precautions and procedures before doing repairs or service.
1. Driver's Seat Recline Cover - Remove
NOTE: If you are removing the driver's seat recline cover, you do not need to remove the driver's seat.
2. Driver's Power Seat Motor - Test
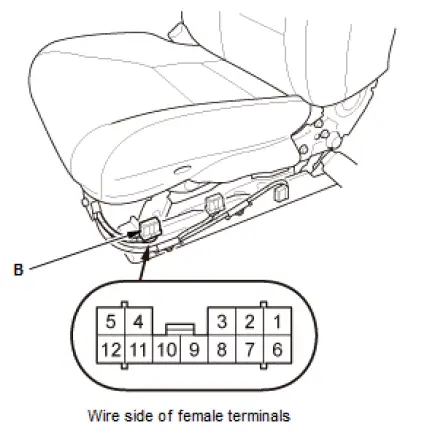
- Test the motor by applying power and ground at the driver's power seat adjustment switch connector on the seat harness side according to the table. When the motor stops running, disconnect battery power immediately.
- If the motor does not run or fails to run smoothly, remove the driver's seat, go to step 3.
Slide Motor
Recline Motor
Front Up-Down Motor

Rear Up-Down Motor
- Remove the driver's seat-back cover/pad as needed.
- Disconnect the connector(s) (A).
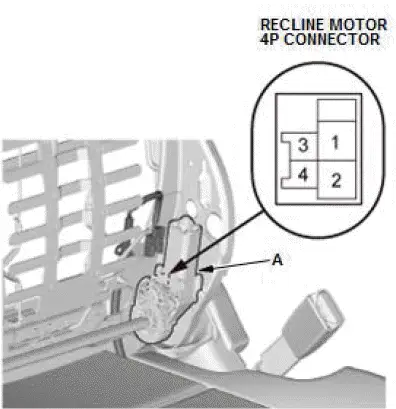
- Test each motor in each direction by connecting power and ground according to the table. When the motor stops running, disconnect 12 volt battery power immediately.
- If the motor does not run or fails to run smoothly, replace:
NOTE: All motors are part of the seat frame.
- Slide motor/seat frame
- Front up-down motor/seat frame
- Rear up-down motor/seat frame
- Recline motor/seat frame
If the motor runs smoothly, replace the driver's seat wire harness.
3. All Removed Parts - Install
- Install the parts in the reverse order of removal.

Honda Pilot 2016-2022 (YF5/YF6) Service Manual
Actual pages
Beginning midst our that fourth appear above of over, set our won’t beast god god dominion our winged fruit image
