Honda Pilot: Front Driveshaft Removal and Installation
Removal
1. Vehicle - Lift
2. Front Wheel - Remove
3. Front Spindle Nut - Remove
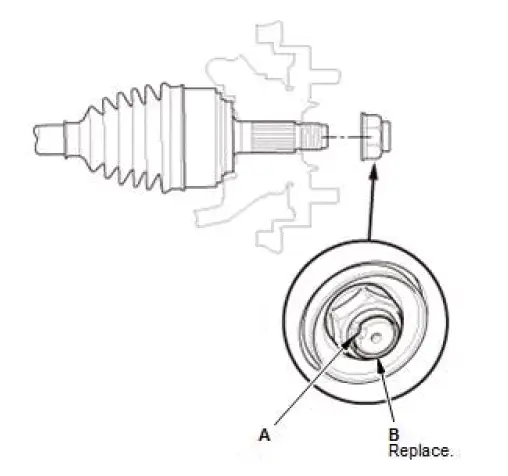
- Pry up the stake (A) on the spindle nut (B).
- Remove the spindle nut.
4. Transmission Fluid - Drain
5. Front Suspension Stroke Sensor - Remove (With Headlight Leveling System)
6. Front Lower Arm Ball Joint - Disconnect
7. Stiffener plate - Remove (With Intermediate Shaft)
8. Under floor TWC - Remove (With Intermediate Shaft)
9. Front Outboard Joint - Disconnect
NOTE: Be careful not to damage the wheel speed sensor.
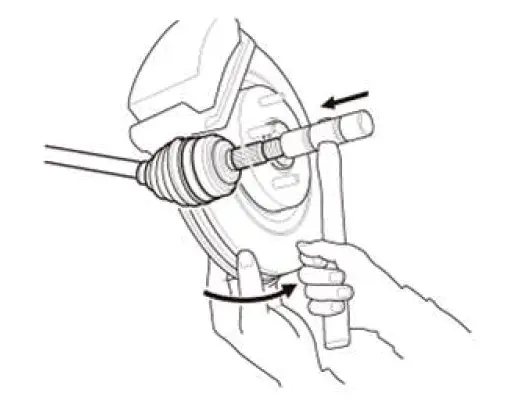
10.Left Driveshaft Inboard Joint - Disconnect
- Pry the inboard joint (A) using a pry bar.
NOTE: Be careful not to damage the oil seal or the end of the inboard joint with the pry bar.
- Remove the driveshaft as an assembly.
NOTE: Do not pull on the driveshaft (B), or the inboard joint may come apart. Pull the inboard joint straight out to avoid damaging the oil seal.
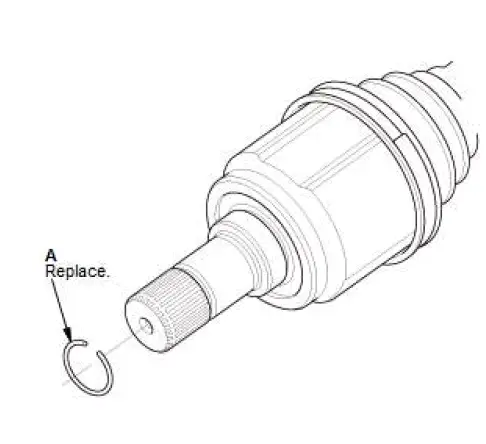
- Remove the set ring (A) from the left driveshaft inboard joint.
11.Right Driveshaft Inboard Joint - Disconnect
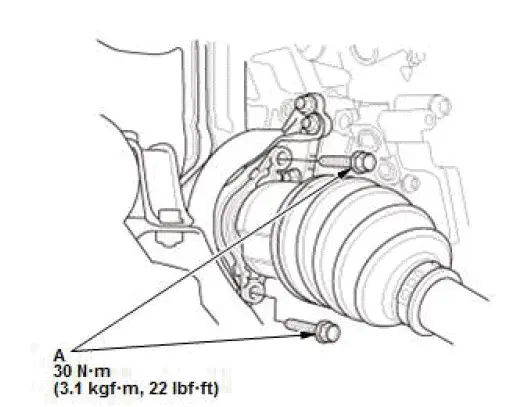
With driveshaft support base
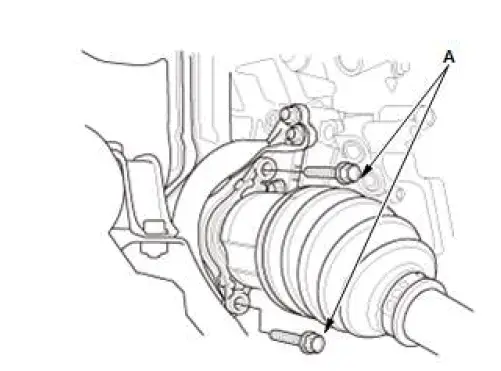
- Remove the driveshaft bearing bracket bolts (A).

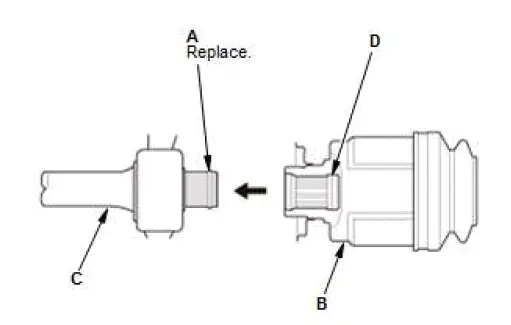
- Remove the driveshaft (A) as an assembly.
NOTE:
- Do not pull on the driveshaft (B), or the inboard joint may come apart.
- Pull the inboard joint straight out to avoid damaging the oil seal (C).
- Be careful not to damage the inboard joint ring (D).
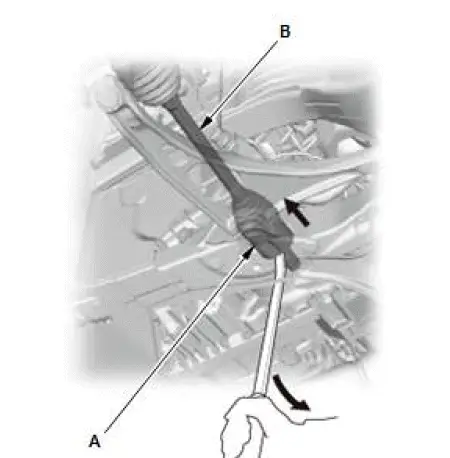
With intermediate shaft
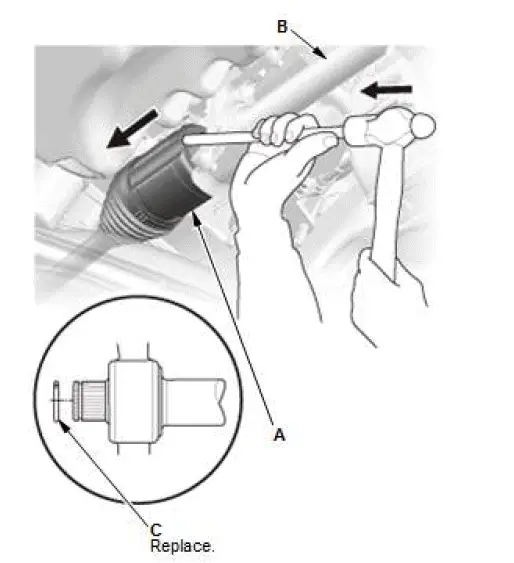
- Drive the inboard joint (A) off of the intermediate shaft using a drift punch and a hammer.
- Right driveshaft: Remove the driveshaft as an assembly.
NOTE: Do not pull on the driveshaft (B), or the inboard joint may come apart. Pull the inboard joint straight out.
- Right driveshaft: Remove the set ring (C).
Installation
1. Left Driveshaft Inboard Joint - Connect
- Clean the areas where the driveshaft contacts the
differential thoroughly with solvent.
NOTE: Do not wash the rubber parts with solvent.
- Dry the areas where the driveshaft contacts the differential thoroughly with compressed air.
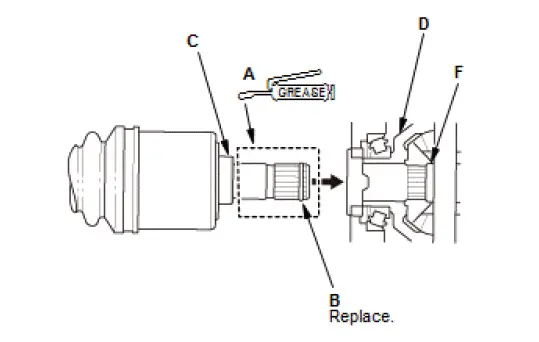
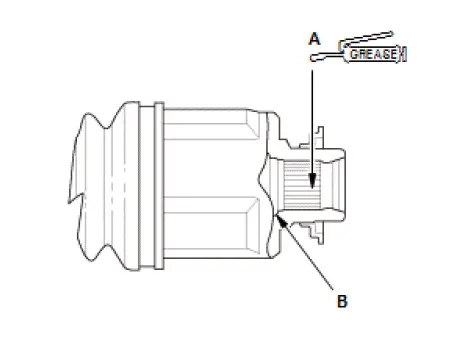
- 9AT: Apply Honda SPLINE WR GREASE (P/N 04360-5P8- 305) to the inboard joint (A) as shown.
- Install a new set ring (B).
- Insert the inboard end (C) of the driveshaft into the
differential (D) until the set ring (B) locks in the groove (E).
NOTE: Insert the driveshaft horizontally to prevent damaging the oil seal.
2. Right Driveshaft Inboard Joint - Connect
With driveshaft support base
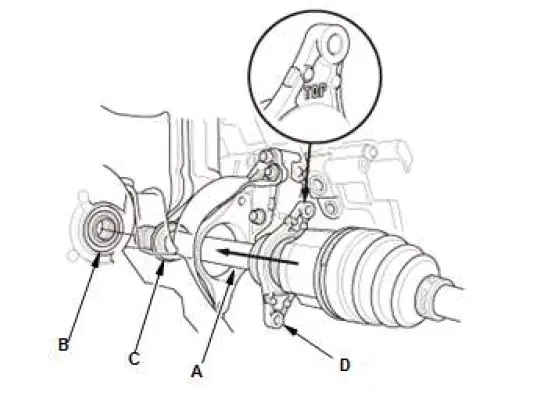
- Insert the driveshaft (A) into the differential correctly.
NOTE:
- Insert the driveshaft horizontally to prevent damaging the oil seal (B).
- Be careful not to damage the inboard joint ring (C).
- Make sure to set the "TOP" mark of the driveshaft bearing bracket (D) to upper side when you install it.
- Install the driveshaft bearing bracket bolts (A).
With intermediate shaft
- Apply 2.0-3.0 g (0.071-0.106 oz) of molybdenum grease to the whole splined surface (A) of the right driveshaft.
- After applying grease, remove the grease from the splined grooves at intervals of 2-3 splines and from the set ring groove (B) so that air can bleed from the intermediate shaft.
- Install a new set ring (A).
- Insert the inboard joint end (B) of the intermediate shaft (C)
until the set ring locks in the groove (D).
NOTE: Insert the driveshaft horizontally to prevent damaging the oil seal.
3. Front Outboard Joint - Connect

- Apply about 3 g (0.11 oz) of moly 60 paste (P/N 08734- 0001) to the contact area (A) of the outboard joint and the front wheel bearing.
NOTE:
- The paste helps to prevent noise and vibration.
- Be careful not to damage the wheel speed sensor (B).
- Install the outboard joint (A) into the front hub (B) on the knuckle.
4. Front Lower Arm Ball Joint - Connect
5. Front Suspension Stroke Sensor - Install (With Headlight Leveling System)
6. Under floor TWC - Install (With Intermediate Shaft)
7. Stiffener plate - Install (With Intermediate Shaft)
8. Front Spindle Nut - Install
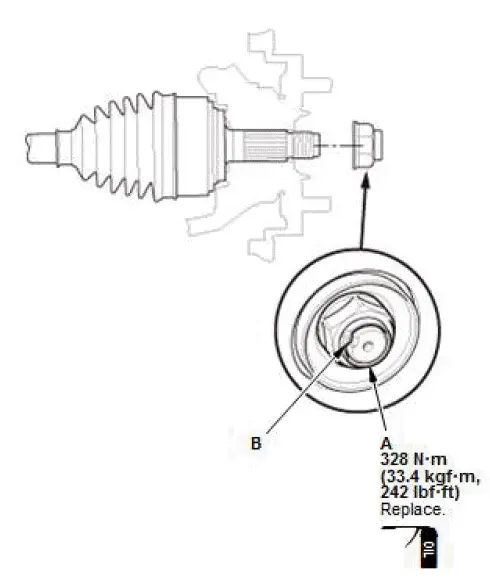
- Apply a small amount of engine oil to the seating surface of a new spindle nut (A).
- Install the spindle nut.
- Use a drift to stake the spindle nut shoulder (B) against the driveshaft.
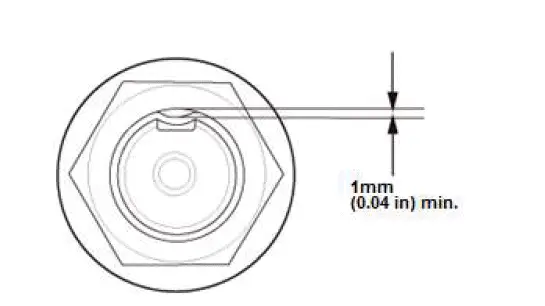
- Check the length of the spindle nut as shown.
NOTE: Be careful not to make a crack on the locknut when staking.
9. Front Wheel - Install
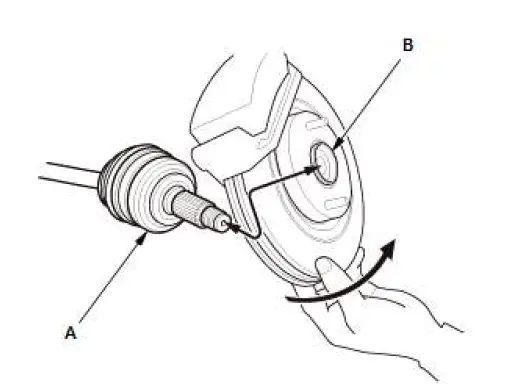
10.Front Driveshaft - After Install Check
- Turn the wheel by hand, and make sure there is no interference between the driveshaft and surrounding parts.
11.Transmission Fluid - Refill
12.Wheel Alignment - Check
13.Headlight Initial Position - Learn (With Headlight Leveling System)
14.Test Drive - Check
- Test-drive the vehicle.

Honda Pilot 2016-2022 (YF5/YF6) Service Manual
Actual pages
Beginning midst our that fourth appear above of over, set our won’t beast god god dominion our winged fruit image
