Honda Pilot: Injector Removal and Installation
Removal
NOTE: When replacing one injector, you must replace the fuel joint pipe and all the injectors on that bank or fuel rail as a set.
Failure to do so will cause poor engine performance and fuel leaks.
1. Fuel Pressure - Relieve
2. Intake Manifold and Intake Manifold Base - Remove
3. High Pressure Fuel Pump Cover - Remove
4. Fuel Rail Cover - Remove
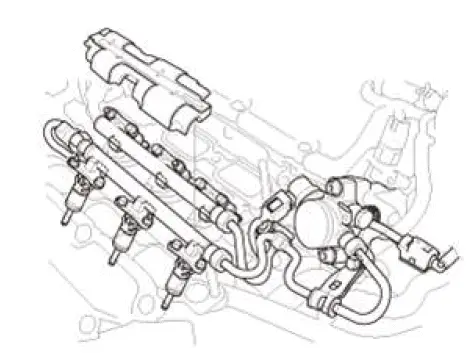
5. Fuel Joint Pipe - Remove
6. Fuel Rail and Injector - Remove
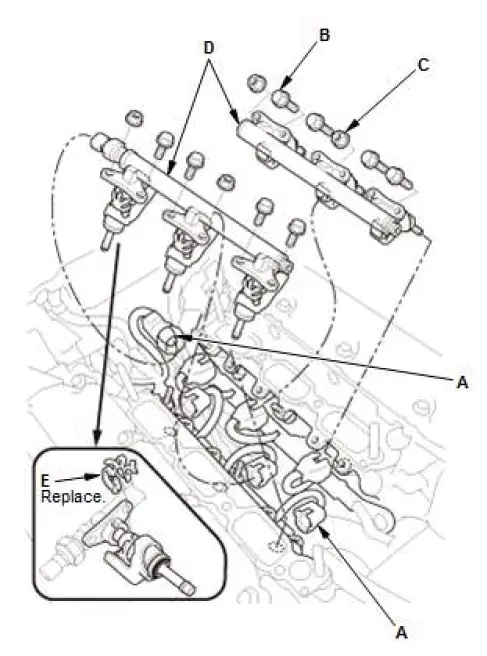
- Disconnect the connectors (A).
- Remove the fuel rail mounting bolts (B) and nuts (C).
- Carefully remove the fuel rails (D) with the injectors straight from the cylinder head.
NOTE:
- If the injector remains on the cylinder head, carefully remove the injector straight from the cylinder head.
- Note the cylinder number of the injector, and install it to the same cylinder when reinstalling.
- If you replace the injector, the fuel rail, or the cylinder head, use a new injector clip (E).
7. Injector - Remove
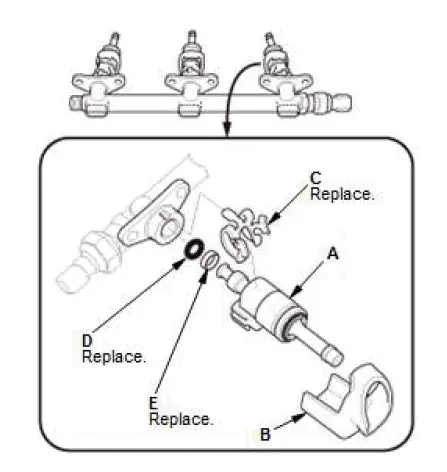
- Remove the injectors (A) from the fuel rail.
- Remove the injector cover (B), injector clip (C), O-ring (D)
and the back-up ring (E) from the injector.
NOTE: If you replace the injector, the fuel rail, or the cylinder head, use a new injector clip, O-ring, and back-up ring.
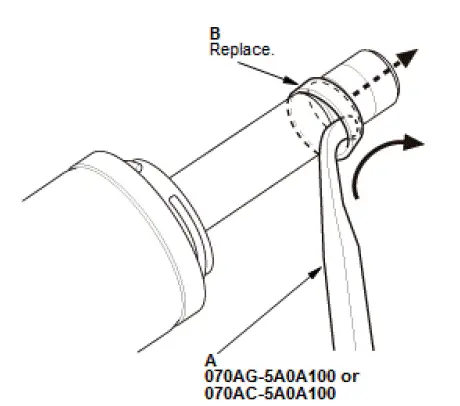
- Using the pick up tool (A), carefully remove the seal (B) from the injector.
Installation
NOTE: When replacing one injector, you must replace the fuel joint pipe and all the injectors on that bank or fuel rail as a set.
Failure to do so will cause poor engine performance and fuel leaks.
1. Injector Seal - Install
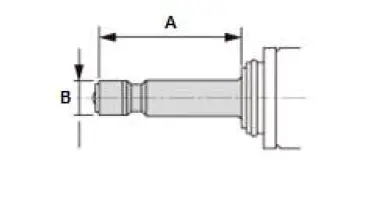
- With a paper towel, carefully wipe off any carbon from the area (A) shown.
NOTE:
- Do not wipe off the tip area (B) of the injector as it may be damaged.
- If the tip of the injector is dirty or clogged, it must be replaced. The injectors cannot be cleaned.
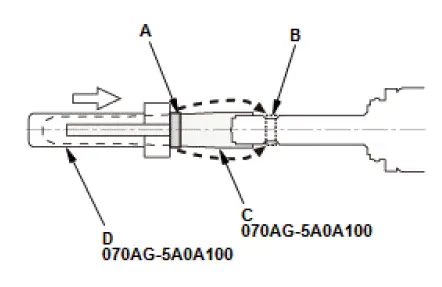
- Quickly push a new seal (A) down to the groove (B) of the injector using the seal guide tool (C) and the seal installer (D).
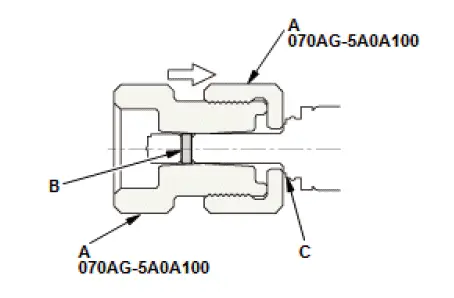
- Joint the sizing tools (A), then slide them as a set onto the seal (B) until tools touch to the injector stepped surface (C) as shown, and hold the tools to reform the seal for 30 seconds or more.
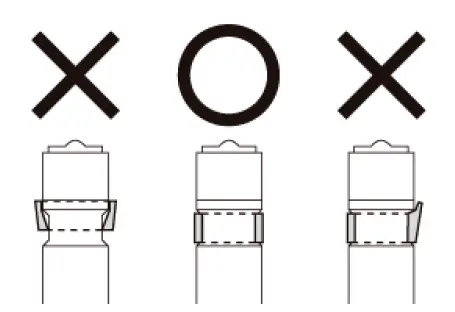
- Remove the sizing tool, and check that the seal is installed correctly.
NOTE: When cleaning the sizing tool, be careful not to scratch the sizing tool bore.
2. Injector - Install
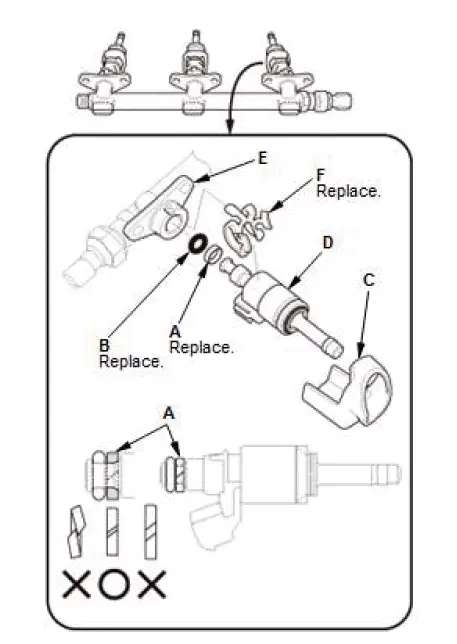
- Install the new back-up ring (A), new O-ring (B) and the injector cover (C) on the injector (D).
NOTE:
- Set the direction of the back-up ring as shown
- Check that the back-up ring sets correctly after installation.
- Use compressed air to insure that there are no dust or debris around the ring.
- Coat the O-ring with clean engine oil, then install the injector onto the fuel rail (E) with a new clip (F).
NOTE: When installing the injector, be sure to protect the injector from dust or debris.
3. Fuel Rail and Fuel Injector - Install
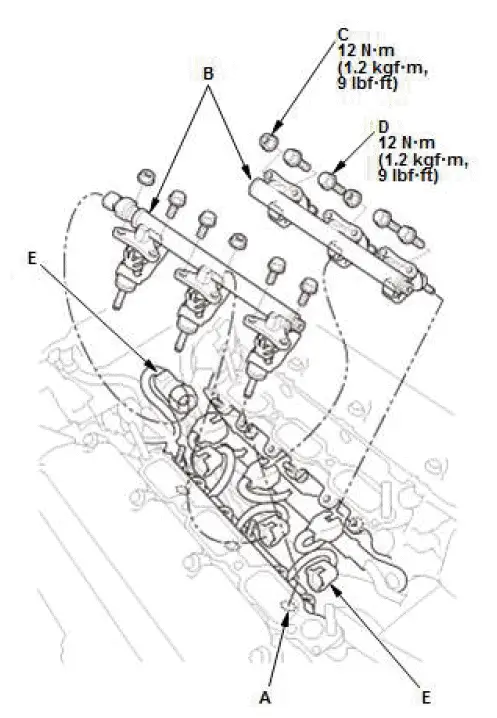
- Coat the injector holes (A) on the cylinder head with clean engine oil.
- Carefully install the fuel rails (B) with the injectors into the
cylinder head straight and equal.
NOTE: When installing the injector, protect tip of the injector from dust or debris.
- Install the nuts (C), and tighten them slowly in an alternate pattern until the fuel rail sits on the cylinder head.
- Tighten the nuts and the bolts (D) to the specified torque.
- Connect the connectors (E).
4. Fuel Joint Pipe - Install
NOTE: Failure to install a new fuel joint pipe will cause fuel leaks.
5. Fuel Leak (Low Pressure Side) - Check
- Turn the vehicle to the ON mode, but do not start the engine. After the fuel pump runs for about 2 seconds, the fuel line will be pressurized. Repeat this two or three times, then check for fuel leakage.
6. Fuel Leak (High Pressure Side) - Check
7. Fuel Rail Cover - Install
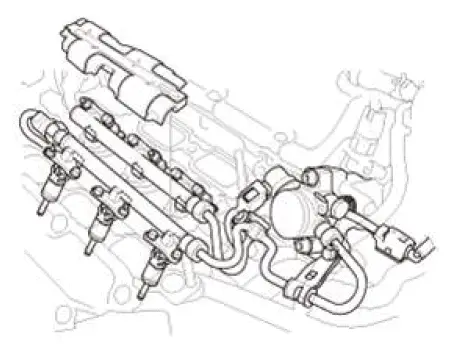
Special Tool Required
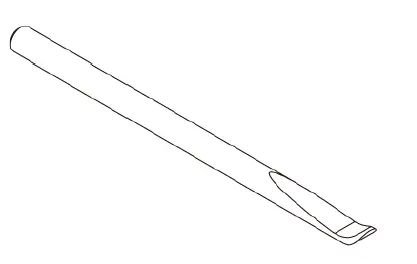
- Pick Up Tool 070AC-5A0A100
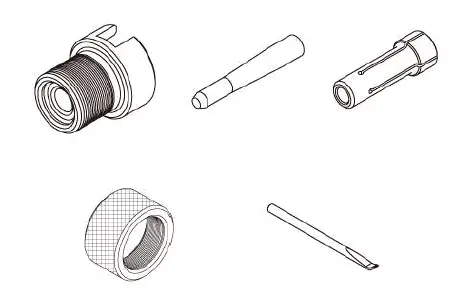
- Injector Seal Installer Kit 070AG-5A0A100

Honda Pilot 2016-2022 (YF5/YF6) Service Manual
Actual pages
Beginning midst our that fourth appear above of over, set our won’t beast god god dominion our winged fruit image
