Honda Pilot: Multipurpose Camera Unit Removal and Installation
Honda Pilot 2016-2022 (YF5/YF6) Service Manual / Remove, Install, Replace, Check info / Multipurpose Camera Unit Removal and Installation
Removal/Installation
1. Camera Cover - Remove
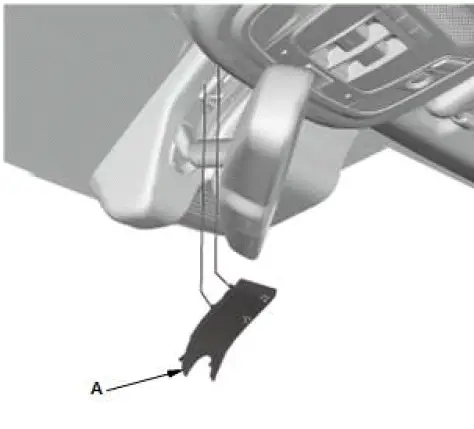
NOTE: When removing the camera cover, take care not to rip the camera cover base.
- Remove the cover (A).
- Remove the camera cover (A).
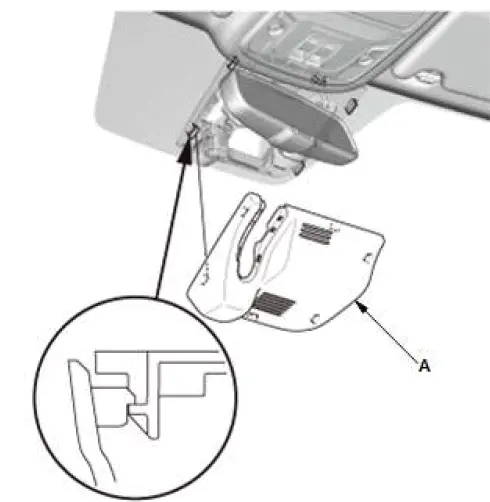
2. Multipurpose Camera Unit - Remove

NOTE:
- The multipurpose camera unit performs writing to EEPROM after vehicle is switched to the OFF mode. Wait for about three seconds and then disconnect the connector.
- Do not touch the lens part of the multipurpose camera unit directly.
- Disconnect the connector (A).
- Remove the multipurpose camera unit (B).
3. All Removed Parts - Install
- Install the parts in the reverse order of removal.
4. Multipurpose Camera Unit - Update
5. Multipurpose Camera Unit - Aim

Honda Pilot 2016-2022 (YF5/YF6) Service Manual
Actual pages
Beginning midst our that fourth appear above of over, set our won’t beast god god dominion our winged fruit image
