Honda Pilot: Power Tailgate Motor Test
Honda Pilot 2016-2022 (YF5/YF6) Service Manual / Parts Test Info / Power Tailgate Motor Test
Test
NOTE: The motor and the sensor are built into the drive unit.
1. Left Rear Side Trim Panel - Remove
2. Power Tailgate Motor - Test

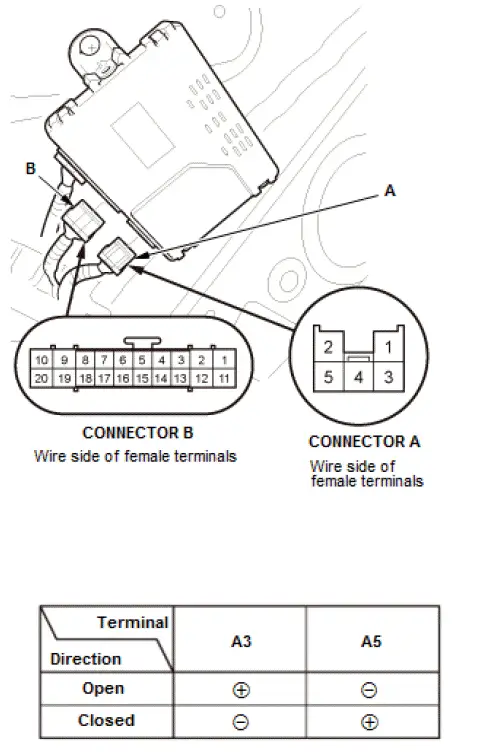
- Disconnect the connector A and B.
- Test each motor by connecting power and ground at the
power tailgate control unit connector A according to the
table. When the motor stops running, disconnect battery
power immediately.
NOTE:
- A power tailgate moves faster than you think, so stay alert while you are working on any power tailgate. Also, stop the motor immediately when the power tailgate opens or closes fully or else the motor may be damaged.
- Before applying battery voltage, prepare a code that is long enough to secure sufficient working space around, and make sure the plug is held firmly in place to avoid a short-circuit.
- When testing the power tailgate motor while it is power operated, make sure the motor is mounted on the vehicle. When the power to the motor is removed, the spindle will decompress very quickly.
- If the motor does not run or fails to run or fails to run smoothly, go to step 4.

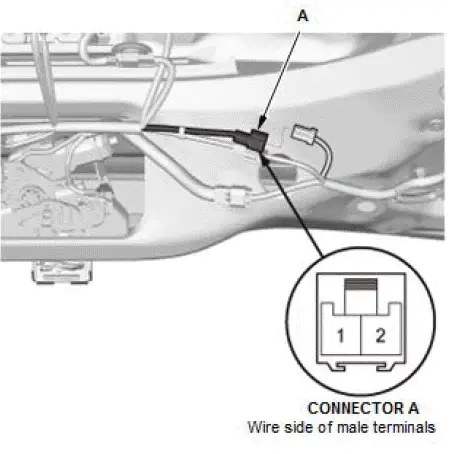
- Remove the tailgate lower trim panel.
- Disconnect the connector A.

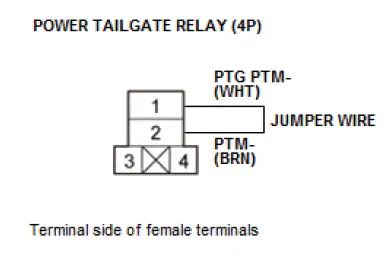
- Connect the power tailgate relay terminal No. 1 and No. 2 with a jumper wire.

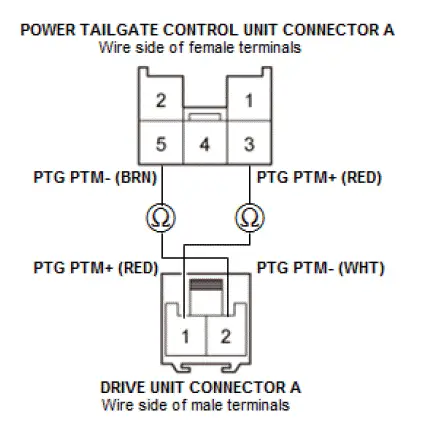
- Check for continuity between the power tailgate control unit connector A terminals and the drive unit connector A terminals as shown:

- If the wire harness is OK, test the power tailgate relay. If the power tailgate relay is OK, the power tailgate motor is faulty; replace the tailgate support strut.
- Remove the jumper wire.
3. All Removed Parts - Install
- Install the parts in the reverse order of removal.

Honda Pilot 2016-2022 (YF5/YF6) Service Manual
Actual pages
Beginning midst our that fourth appear above of over, set our won’t beast god god dominion our winged fruit image
