Honda Pilot: Rear Brake Disc Removal and Installation
Honda Pilot 2016-2022 (YF5/YF6) Service Manual / Remove, Install, Replace, Check info / Rear Brake Disc Removal and Installation
Removal/Installation
NOTE: Keep grease away from the brake disc/drum and the brake pads.
1. Vehicle - Lift
2. Rear Wheel - Remove
3. Parking Brake - Release
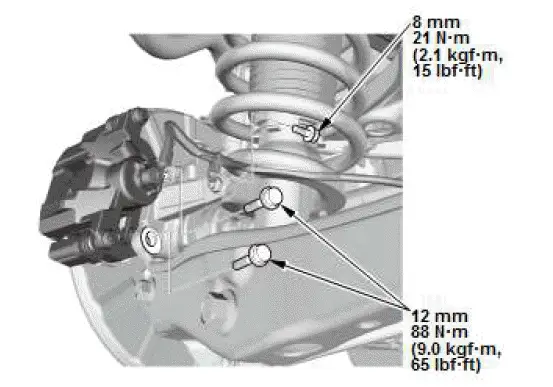
4. Brake Caliper - Remove
NOTE:
- To prevent damage to the caliper assembly or brake hose, use a short piece of wire to hang the caliper assembly from the undercarriage.
- Do not twist the brake hose excessively.
5. Brake Disc/Drum - Remove
- Remove the brake disc/drum (A).
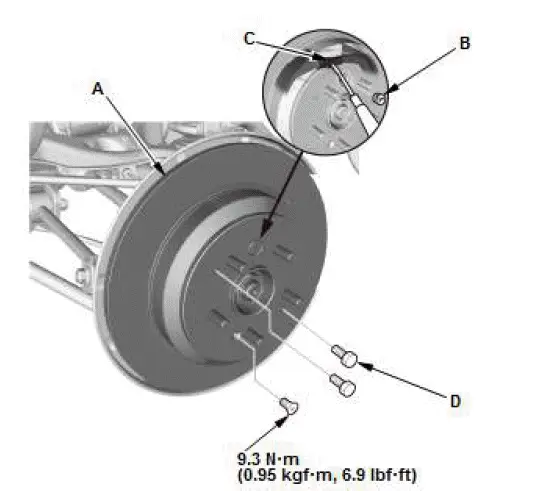
NOTE:
- Remove the access plug (B), then if necessary, turn the adjuster nut (C) with a flat-tip screwdriver until the shoes become loose.
- If the brake disc/drum is stuck to the hub bearing unit,
thread two 8 x 1.25 mm bolts (D) into the brake
disc/drum to push it away from the hub bearing unit.
Turn each bolt 90 degrees at a time to prevent the brake disc/drum from binding.
6. All Removed Parts - Install
- Install the brake disc/drum in the reverse order of removal,
and note these items:
- Before installing the brake disc/drum, clean the mating surfaces between the hub bearing unit and the inside of the brake disc/drum.
- Adjust the parking brake.
7. Rear Brake Disc/Drum Runout - Inspect

Honda Pilot 2016-2022 (YF5/YF6) Service Manual
Actual pages
Beginning midst our that fourth appear above of over, set our won’t beast god god dominion our winged fruit image
