Honda Pilot: Rear Brake Pad Removal and Installation
Removal
CAUTION
Frequent inhalation of brake pad dust, regardless of material composition, could be hazardous to your health.
- Avoid breathing dust particles.
- Never use an air hose or brush to clean brake assemblies. Use an OSHA-approved vacuum cleaner.
1. Brake Fluid - Remove
- Remove some brake fluid from the master cylinder.
2. Vehicle - Lift
3. Rear Wheels - Remove
4. Brake Hose Mounting Bolt - Remove
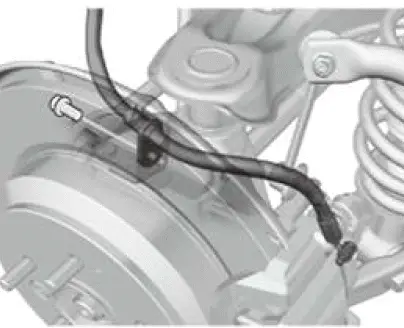
5. Brake Pad - Remove
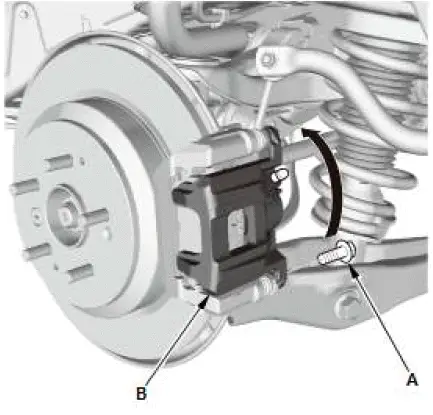
- Remove the flange bolts (A).
NOTE: Be careful not to damage the pin boots.
- Remove the caliper body (B).
NOTE: Check the hose and the pin boots for damage and deterioration.
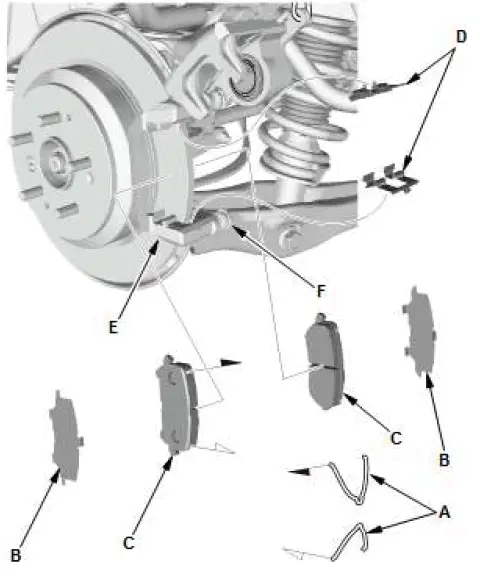
- Remove the pad return springs (A).
- Remove the pad shims (B) and the brake pads (C).
- Remove the upper and lower pad retainers (D).
NOTE: The upper and lower pad retainers are different.
During installation, make sure the pad retainers are in the proper positions.
- Clean the caliper bracket (E) thoroughly; remove any rust, and check for grooves and cracks.
- Verify that the caliper pins (F) move in and out smoothly.
Clean and lube if needed.
6. Brake Disc/Drum - Inspect
Installation
CAUTION
Frequent inhalation of brake pad dust, regardless of material composition, could be hazardous to your health.
- Avoid breathing dust particles.
- Never use an air hose or brush to clean brake assemblies. Use an OSHA-approved vacuum cleaner.
1. Brake Pad - Install
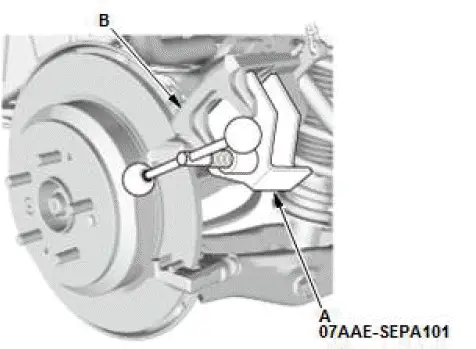
- Install the brake caliper piston compressor tool (A) on the caliper body (B).
- Press in the piston with the brake caliper piston compressor
tool.
NOTE: Be careful when pressing in the piston; brake fluid might overflow from the master cylinder's reservoir. If brake fluid gets on any painted surface, wash it off immediately with water.
- Remove the brake caliper piston compressor tool.
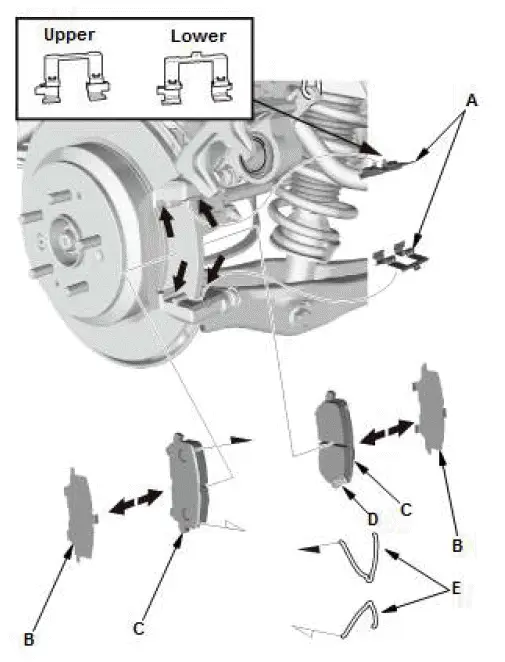
- Apply a thin coat of M-77 assembly paste (P/N 08798-9010) to the retainer mating surface of the caliper bracket (indicated by the arrows).
- Install the upper and lower pad retainers (A).
NOTE: The upper and lower pad retainers are different.
Make sure the pad retainers are in the proper positions.
- Apply a thin coat of M-77 assembly paste (P/N 08798-9010) to the pad side of the shims (B), the back of the brake pads (C), and the other areas indicated by the arrows.
- Wipe off the excess assembly paste from the retainers.
Keep the assembly paste away from the brake disc/drum and the brake pads.
- Wipe off the excess assembly paste from the pad shim and
brake pads friction material. Keep grease and assembly
paste away from the brake disc/drum and brake pads.
Contaminated brake disc/drum or brake pads reduce stopping ability.
- Install the brake pads and pad shim correctly. Install the
brake pad with the wear indicator (D) on the bottom inside
position.
NOTE: If you are reusing the brake pads, always reinstall the brake pads in their original positions to prevent a temporary loss of braking efficiency.
- Install the pad return springs (E).
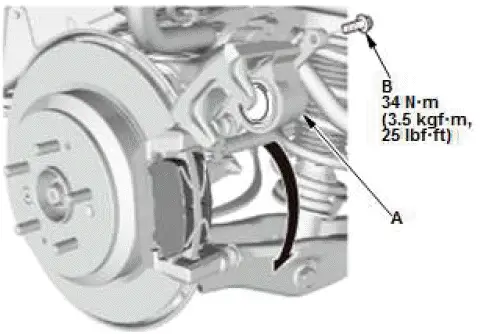
- Pivot the caliper body (A) down into position.
- Install the flange bolt (B), and tighten it to the specified
torque.
NOTE: Be careful not to damage the pin boot.
- Press the brake pedal several times to make sure the
brakes work.
OTE: Engagement may require a greater pedal stroke immediately after the brake pads have been replaced as a set. Several applications of the brake pedal will restore the normal pedal stroke.
2. Brake Hose Mounting Bolt - Remove
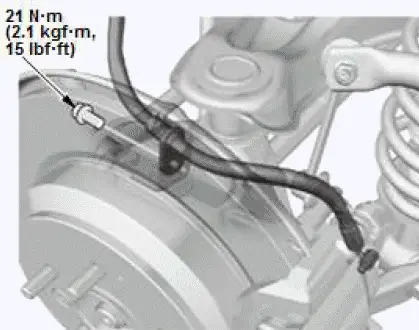
3. Rear Wheels - Install
4. Brake Fluid - Refill
- Add brake fluid as needed.
Special Tool Required
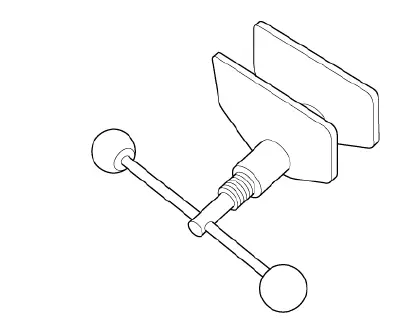
- Brake Caliper Piston Compressor 07AAE-SEPA101

Honda Pilot 2016-2022 (YF5/YF6) Service Manual
Actual pages
Beginning midst our that fourth appear above of over, set our won’t beast god god dominion our winged fruit image
