Honda Pilot: Rear Damper/Spring Disassembly, Reassembly, and Inspection
Honda Pilot 2016-2022 (YF5/YF6) Service Manual / Inspection Info / Rear Damper/Spring Disassembly, Reassembly, and Inspection
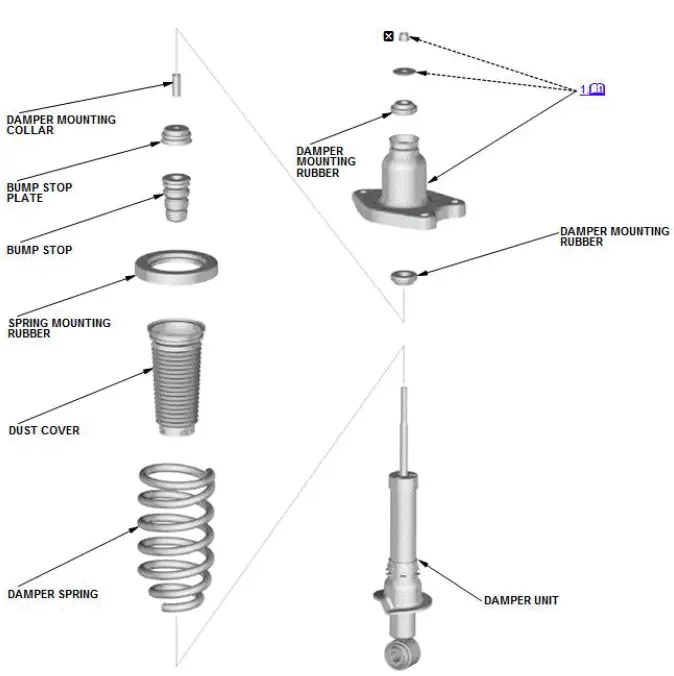
Disassembly
NOTE:
-
 Where icon is
shown, click for further information.
Where icon is
shown, click for further information. - When compressing the damper spring, use a commercially available strut spring compressor according to the manufacturer's instructions.
- Check for deterioration and damage to each part during removal.
 Detailed information, notes, and precautions
 Torque: N-m (kgf-m, lbf-ft)
 Replace
1. Damper Mounting Base - Remove
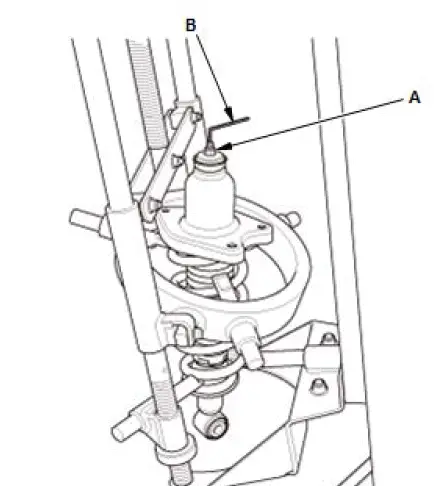
- Compress the damper spring.
NOTE: Do not compress the spring more than necessary to remove the nut.
- Remove the self-locking nut (A) while holding the damper shaft with a hex wrench (B).
- Release the pressure from the strut spring compressor.
- Disassemble the damper as shown in the Exploded View.
Inspection
1. Damper/Spring - Inspect
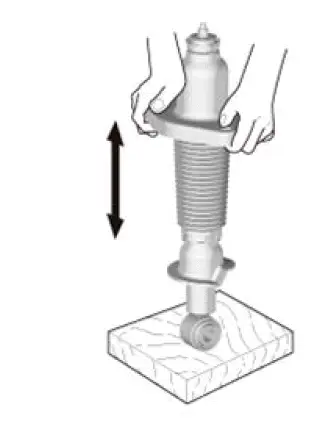
- Reassemble all parts, except for the damper spring
- Compress the damper assembly by hand, and check for smooth operation through a full stroke, both compression and extension. The damper should extend smoothly and constantly when compression is released. If it does not, the gas is leaking and the damper should be replaced.
- Check for oil leaks, abnormal noises, or binding during these tests.
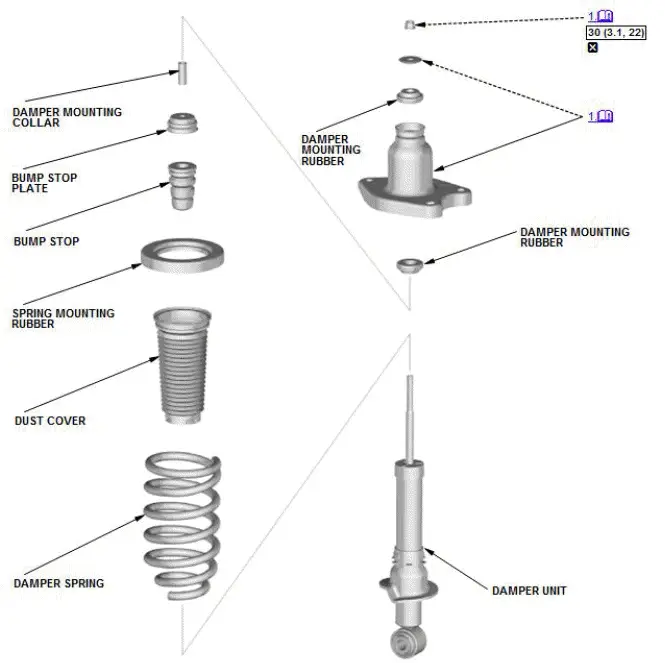
Reassembly
NOTE:
- Where icon is shown, click for further information.
- When compressing the damper spring, use a commercially available strut spring compressor according to the manufacturer's instructions.
 Detailed information, notes, and precautions
 Torque: N-m (kgf-m, lbf-ft)
 Replace
1. Damper Mounting Base - Install

- Install all the parts except the damper mounting washer and the self-locking nut onto the damper unit by referring to the Exploded View.
- Compress the damper spring.
NOTE: Do not compress the spring excessively.
- Align the lower end (A) of the damper spring with the stepped part (B) of the dust cover lower mount and the lower spring seat on the damper unit.
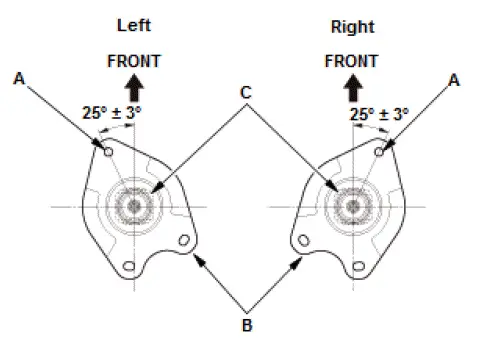
- Align the angle of the bolt hole (A) on the damper mounting base (B) with the bottom (C) of the damper unit as shown.
- Install the damper mounting washer (A).
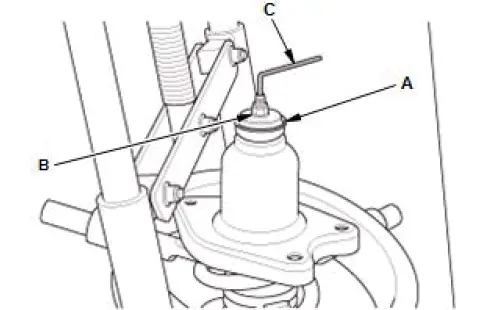
- Loosely install the new self-locking nut (B).
- Hold the damper shaft with a hex wrench (C), and tighten the self-locking nut to the specified torque.
- Remove the damper/spring from the strut spring compressor.

Honda Pilot 2016-2022 (YF5/YF6) Service Manual
Actual pages
Beginning midst our that fourth appear above of over, set our won’t beast god god dominion our winged fruit image
