Honda Pilot: Rear Evaporator Temperature Sensor Removal, Installation, and Test
Honda Pilot 2016-2022 (YF5/YF6) Service Manual / Remove, Install, Replace, Check info / Rear Evaporator Temperature Sensor Removal, Installation, and Test
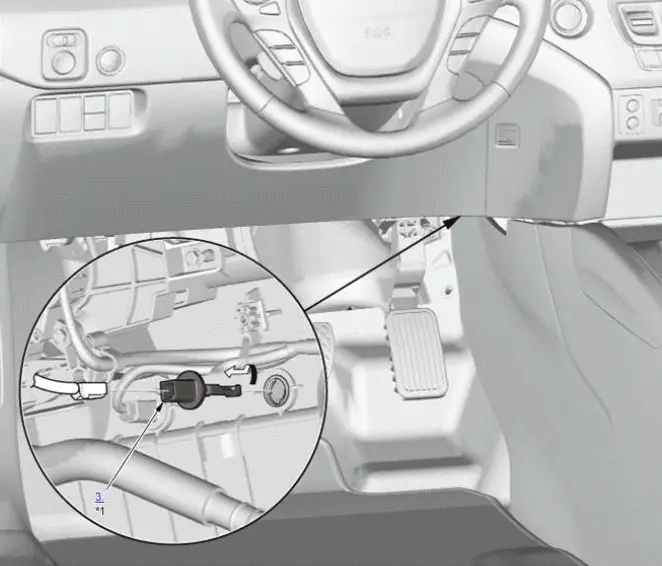
Removal/Installation

*1: Test item
1. Connector (Driver's Footwell Light)- Disconnect
2. Driver's Heater Duct B - Remove
3. Rear Evaporator Temperature Sensor - Remove
4. All Removed Parts - Install
- Install the parts in the reverse order of removal.
Test
Rear Evaporator Temperature Sensor
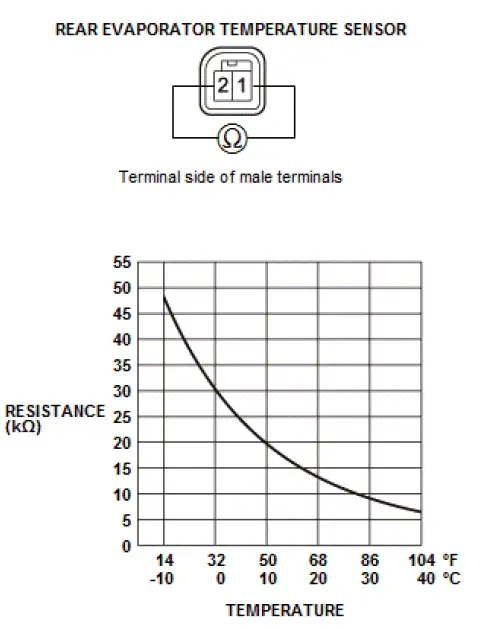
1. Rear Evaporator Temperature Sensor - Test

- Dip the sensor in ice water, and measure the resistance between terminals No. 1 and No. 2.
- Then pour warm water on the sensor, and check for a change in resistance.
- Compare the resistance readings with the specifications shown in the graph; the resistance should be within the specifications.
- If the resistance is not as specified, replace the rear evaporator temperature sensor.
Rear HVAC Control Motor Removal and Installation
Removal/Installation
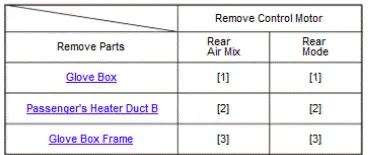
1. Part Removal For Motor Access

NOTE: Numbers in table indicate parts removal order.
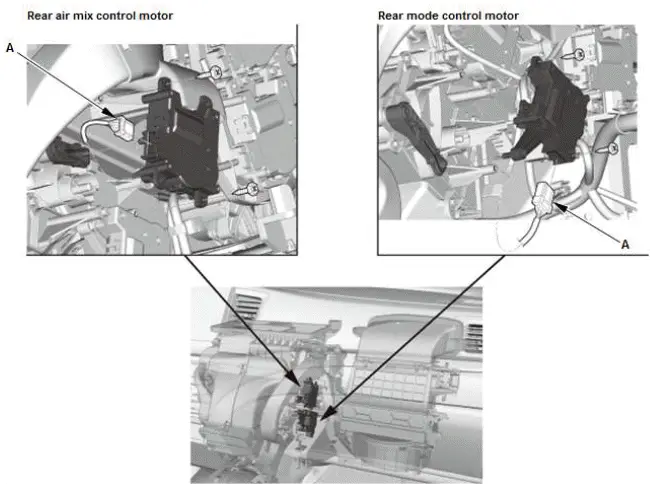
2. Motors Location

A: Connector
3. All Removed Parts - Install
- Install the parts in the reverse order of removal.

Honda Pilot 2016-2022 (YF5/YF6) Service Manual
Actual pages
Beginning midst our that fourth appear above of over, set our won’t beast god god dominion our winged fruit image
