Honda Pilot: Rear Stabilizer Link Removal and Installation
Honda Pilot 2016-2022 (YF5/YF6) Service Manual / Remove, Install, Replace, Check info / Rear Stabilizer Link Removal and Installation
Removal
1. Vehicle - Lift
2. Rear Wheel - Remove
3. Stabilizer Link - Remove
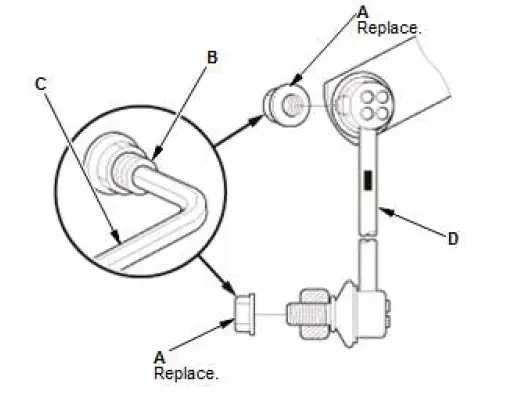
- Remove the flange nuts (A) while holding the respective joint pin (B) with a hex wrench (C).
- Remove the stabilizer link (D).
Installation
1. Stabilizer Link - Install
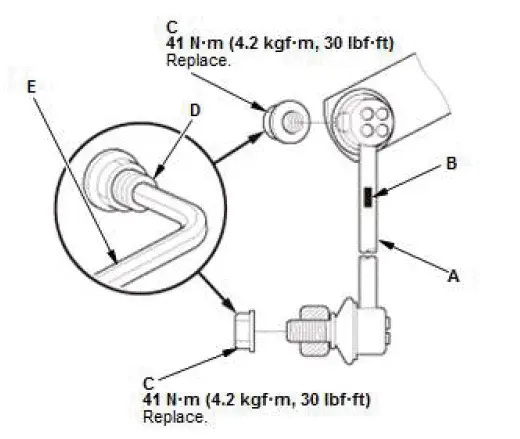
- Install the stabilizer link (A).
NOTE: The stabilizer link has a paint mark (B). The paint mark indicates the difference between the left and right stabilizer links.
- Install the new flange nut (C), and tighten them to the specified torque while holding the respective joint pin (D) with a hex wrench (E).
2. Rear Wheel - Install
3. Test Drive - Check
- Test-drive the vehicle.
- After 5 minutes of driving, tighten the self-locking nut again to the specified torque.

Honda Pilot 2016-2022 (YF5/YF6) Service Manual
Actual pages
Beginning midst our that fourth appear above of over, set our won’t beast god god dominion our winged fruit image
