Honda Pilot: Steering Rack End Removal and Installation
Removal
NOTE: Do not allow dust, dirt, or other foreign materials to enter the steering gearbox.
1. Steering Gearbox - Remove
2. Tie-Rod End - Remove
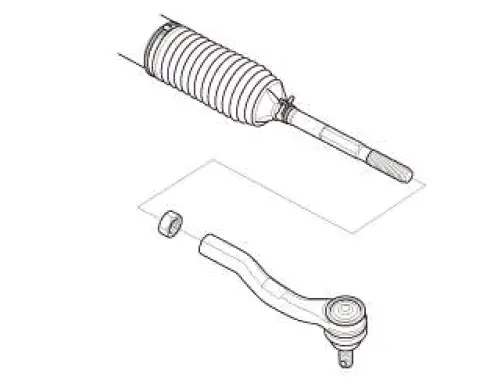
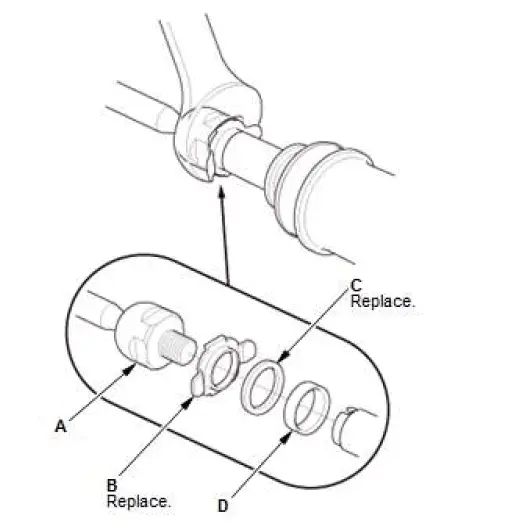
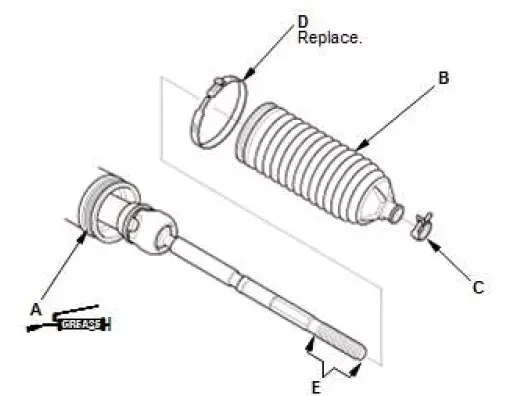
3. Rack End Boot - Remove
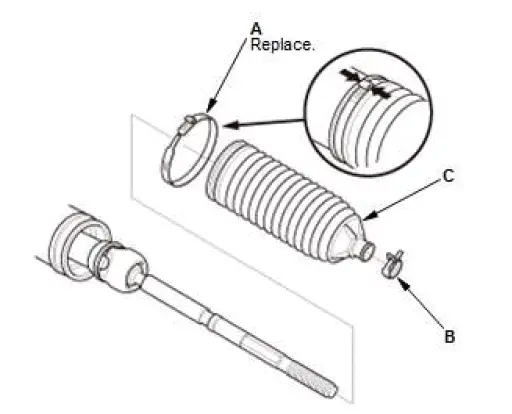
- Remove the boot band (A).
- Remove the tie-rod clip (B).
- Pull the boot (C) away from the ends of the steering gearbox.
4. Rack End - Remove
NOTE: Do not clamp the cylinder part of the gearbox housing in a vise.
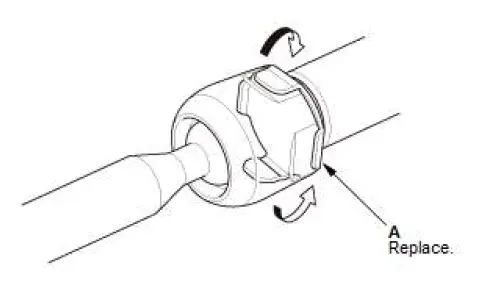
- Unbend the lock washer (A).
- Unscrew the rack end (A) with a wrench.
NOTE: Be careful not to damage the rack surface with the wrench.
- Remove the lock washer (B).
- Remove the spacer (C).
- Remove the damper (D).
Installation
NOTE: Do not allow dust, dirt, or other foreign materials to enter the steering gearbox.
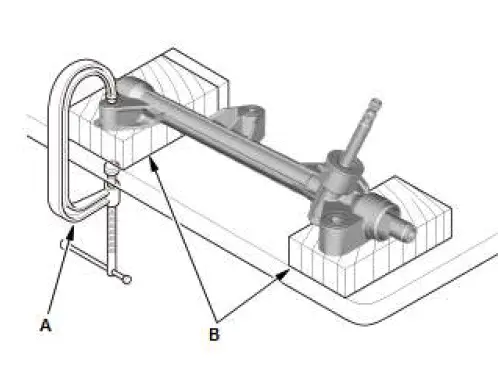
1. Rack End - Install
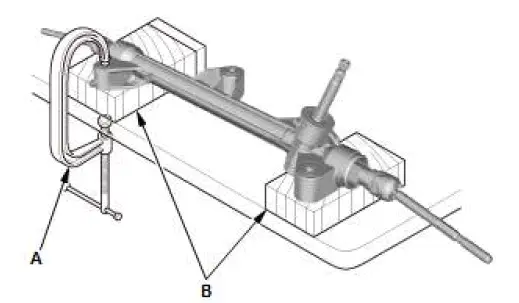
- Hold the gearbox housing using a C-clamp (A) and wooden
blocks (B) to a workbench as shown.
NOTE: Do not clamp the cylinder part of the gearbox housing in a vise.
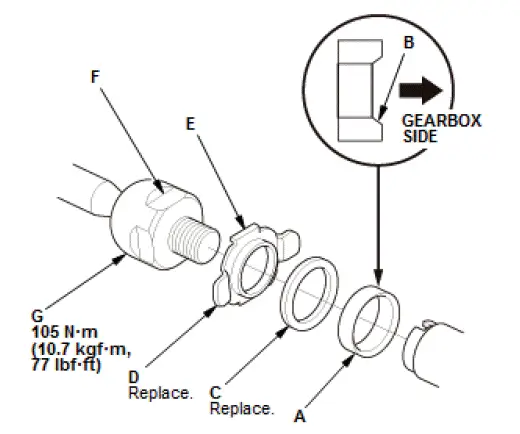
- Install the damper (A).
NOTE: Make sure that the tapered side (B) of the damper is facing toward the gearbox.
- Install a new spacer (C).
- Install a new lock washer (D).
- Align the lock washer tabs (E) with the flat spots (F) on the rack end ball joint housing.
- Install the rack end (G) and tighten it to the specified torque
while holding the lock washer in place.
NOTE: Be careful not to damage the rack surface with the wrench.

- Bend the lock washer (A) back against the flat spots on the rack end joint housing.
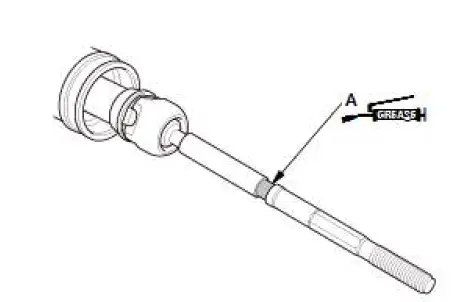
- Apply a light coat of multipurpose grease to the rack end boot groove (A).
2. Rack End Boot - Install
- Apply a light coat of multipurpose grease to the boot installation groove (A) around the gearbox housing.
- Install the boot (B) on the rack end with the tie-rod clip (C) and a new boot band (D).
- Fit the boot end in the installation grooves in the housing properly.
- After installing the boots, wipe the grease off the threaded section (E) of the rack end.
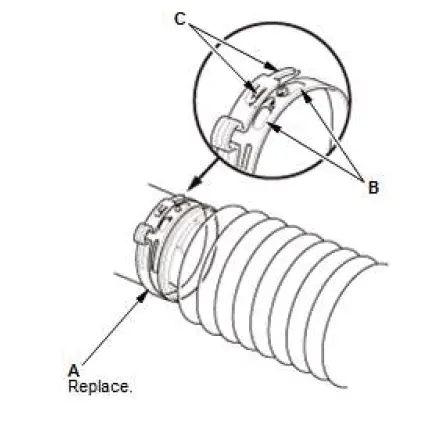
- Set the boot band (A) by aligning the tabs (B) with the holes (C) on the band.
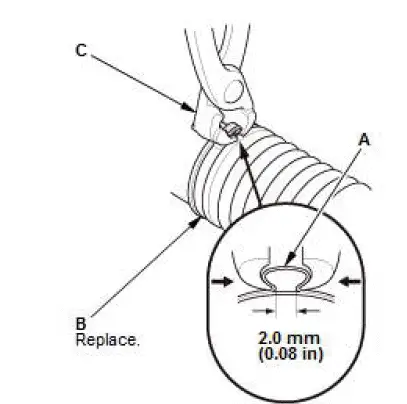
- Close the ear portion (A) of the boot band (B) with pincers Oetiker 1098, commercially available or equivalent (C).
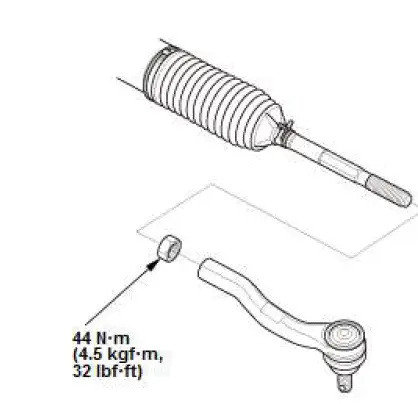
3. Tie-Rod End - Install

Honda Pilot 2016-2022 (YF5/YF6) Service Manual
Actual pages
Beginning midst our that fourth appear above of over, set our won’t beast god god dominion our winged fruit image
