Honda Pilot: Steering Tie-Rod End Ball Joint Boot Replacement
Honda Pilot 2016-2022 (YF5/YF6) Service Manual / Remove, Install, Replace, Check info / Steering Tie-Rod End Ball Joint Boot Replacement
Replacement
1. Vehicle - Lift
2. Front Wheel - Remove
3. Tie-Rod End Ball Joint - Disconnect
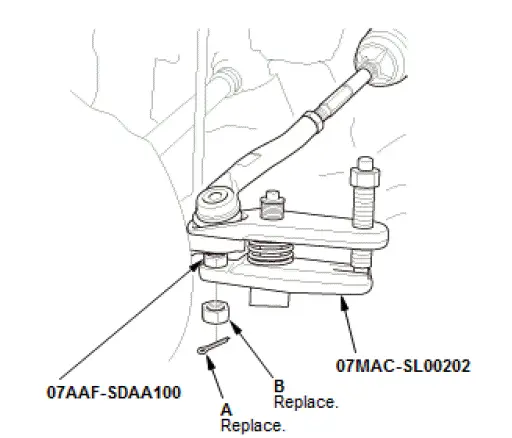
- Remove the cotter pin (A).
- Remove the nut (B).
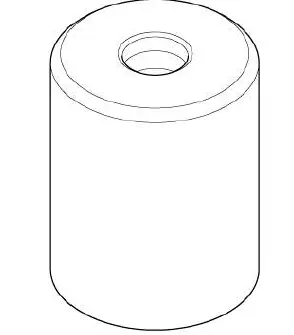
- Disconnect the tie-rod end ball joint from the knuckle using
the ball joint thread protector and the ball joint remover.
NOTE: Be careful not to damage the ball joint boot when installing the ball joint remover.
4. Tie-Rod End Ball Joint Boot - Remove

- Remove the ball joint boot (A) from the tie-rod end.
- Wipe the old grease off the ball pin.
5. Tie-Rod End Ball Joint Boot - Install

- Pack the lower area of the ball pin (A) with fresh multipurpose grease.
- Pack the interior of the new ball joint boot (B) and the lip (C) with fresh multipurpose grease.
Note these items when installing new grease:
- Keep grease off the boot mounting area (D) and the tapered section (E) of the ball pin.
- Do not allow dust, dirt, or other foreign materials to enter the boot.
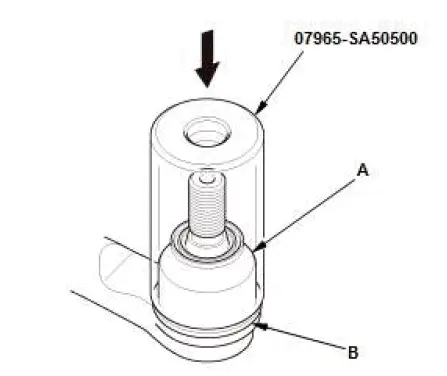
- Install the ball joint boot (A) using the bearing driver attachment.
- The ball joint boot must not have a gap at the ball joint boot installation sections (B).
- After installing the ball joint boot, check the ball pin tapered section for grease contamination.
- Wipe the ball pin tapered section if necessary.
6. Tie-Rod End Ball Joint - Connect
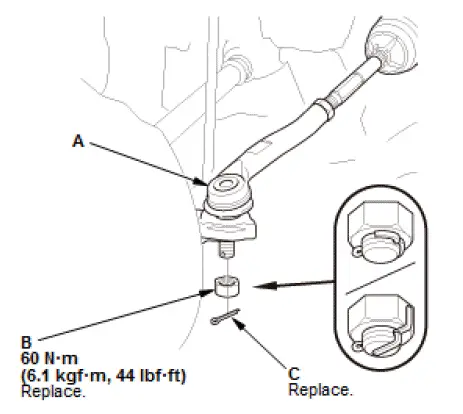
- Wipe off any grease contamination from the ball joint tapered section and threads.
- Connect the tie-rod ball joint (A) to the knuckle.
- Install a new nut (B) and tighten to the specified torque.
- Install a new cotter pin (C).
NOTE: Bend the cotter pin as shown.
Special Tool Required
- Ball Joint Thread Protector, 12 mm 07AAF-SDAA100
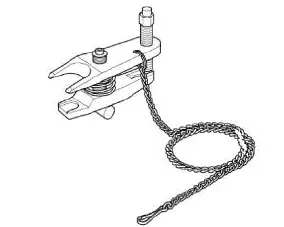
- Ball Joint Remover, 28 mm 07MAC-SL00202
- Bearing Driver Attachment, 36 mm 07965-SA50500

Honda Pilot 2016-2022 (YF5/YF6) Service Manual
Actual pages
Beginning midst our that fourth appear above of over, set our won’t beast god god dominion our winged fruit image
