Honda Pilot: Third Row Seat Removal and Installation
Honda Pilot 2016-2022 (YF5/YF6) Service Manual / Remove, Install, Replace, Check info / Third Row Seat Removal and Installation
Removal/Installation
1. Third Row Seat Cushion Cover/Pad - Remove
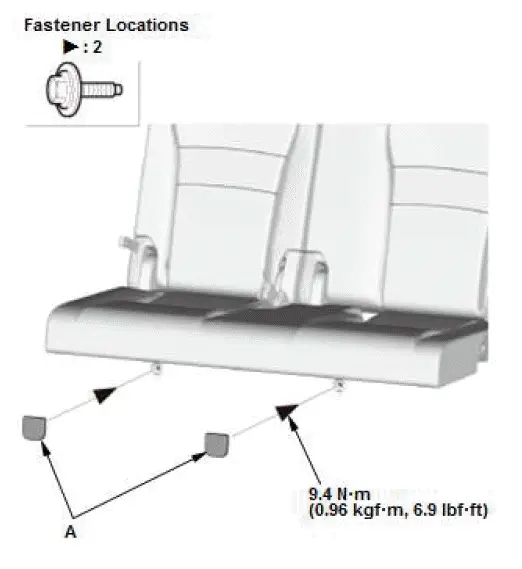
- Remove the foot covers (A) and bolts.
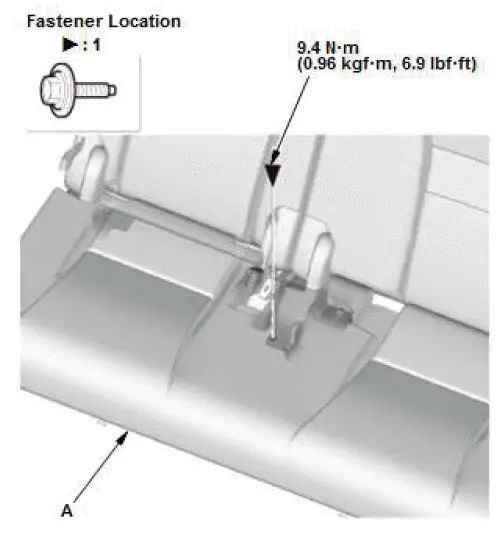
- Remove the bolt and seat cushion cover/pad (A).
2. Cargo Areas Interior Trim - Remove
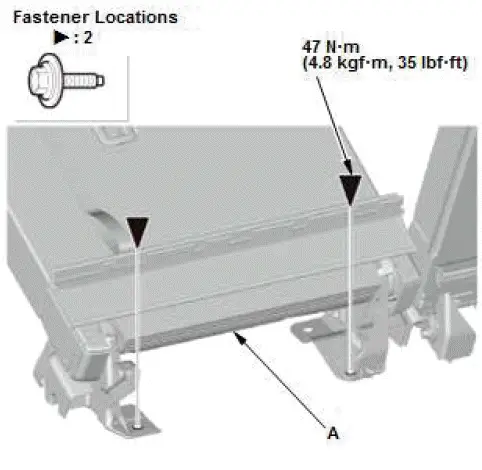
3. Third Row Seat Back - Remove
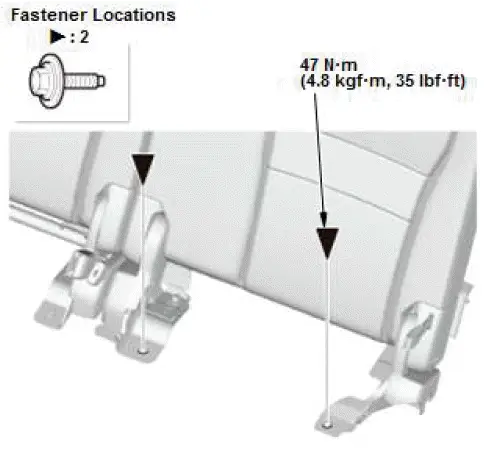
- Remove the bolts.
NOTE: The illustration shows a left rear seat. Do the same procedure for the right rear seat.
- Fold down left seat back (A).
- Remove the bolts and third row seat back.
4. All Removed Parts - Install
- Install the parts in the reverse order of removal.
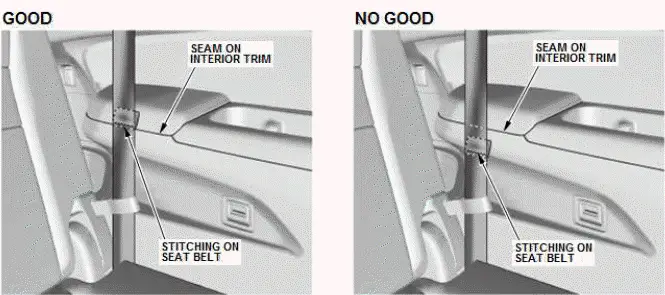
NOTE: Make sure that the left and right third row seat belts are routed correctly after installation of the third row seat by using the inspection method below
- Compare the stitching on the third row seat belt with the edge of the rear side trim panel arm rest.
- If the third row seat belt stitching lines up with the edge of the rear side trim panel arm rest as shown, the third row seat belt is Good.
- Remove the divider cargo bin.
- While pulling up on the third row seat belt, maneuver the third row seat belt from beneath the third row seat outer recline cover to release the belt.
- Go to step 1 again.
Front View
Rear View


Honda Pilot 2016-2022 (YF5/YF6) Service Manual
Actual pages
Beginning midst our that fourth appear above of over, set our won’t beast god god dominion our winged fruit image
