Honda Pilot: Transmission Range Switch Removal and Installation
Removal
1. Front Bulkhead Cover - Remove
2. Air Intake Tube - Remove

3. 12 Volt Battery - Remove
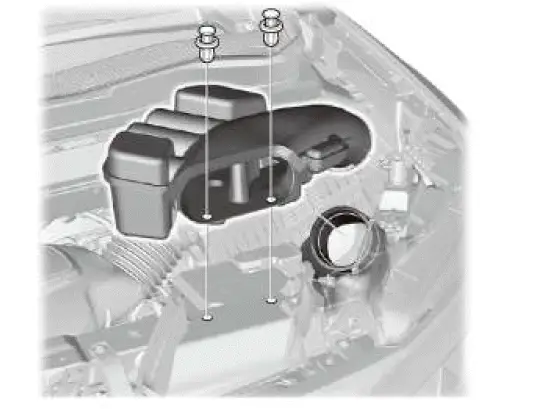
4. 12 Volt Battery Box - Remove
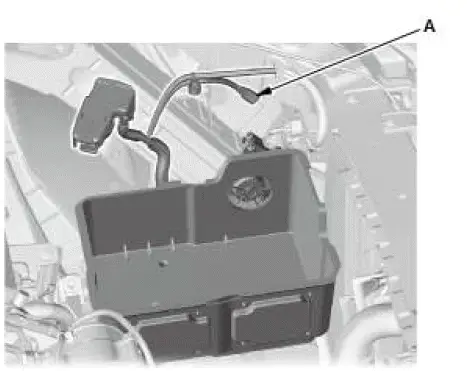
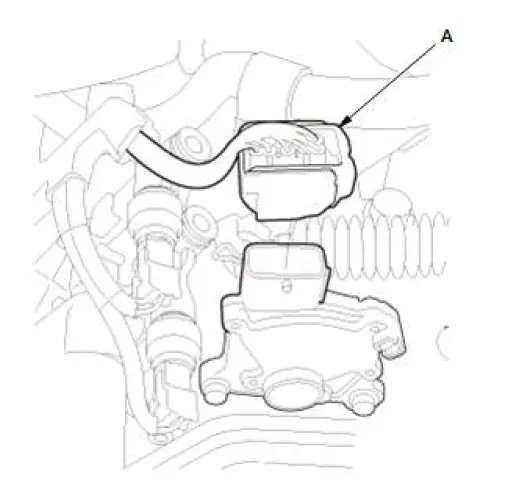
- Disconnect the connector (A)
5. Air Cleaner - Remove
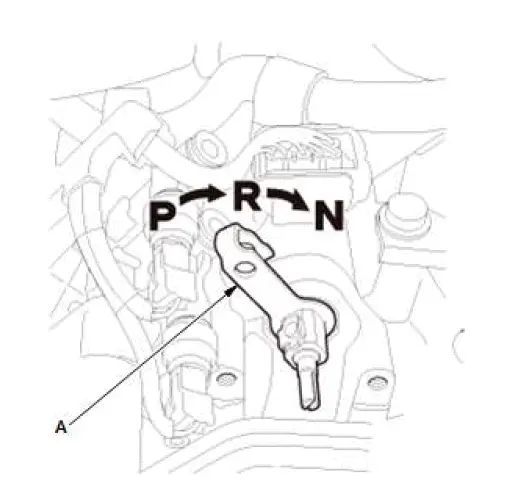
6. Transmission Range Switch - Remove
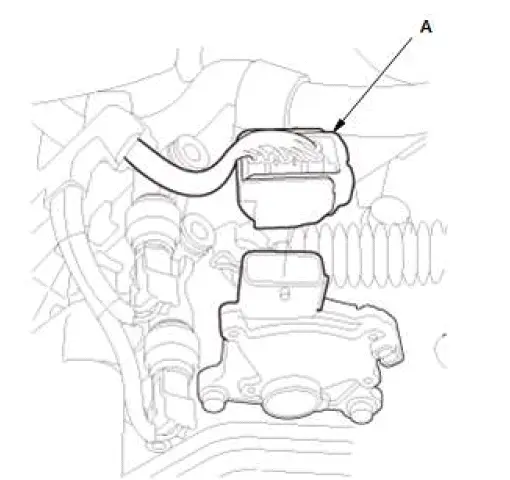
- Shift the shift lever to N.
- Disconnect the connector (A).
- Remove the transmission range switch (A).
Installation
1. Transmission Range Switch - Install
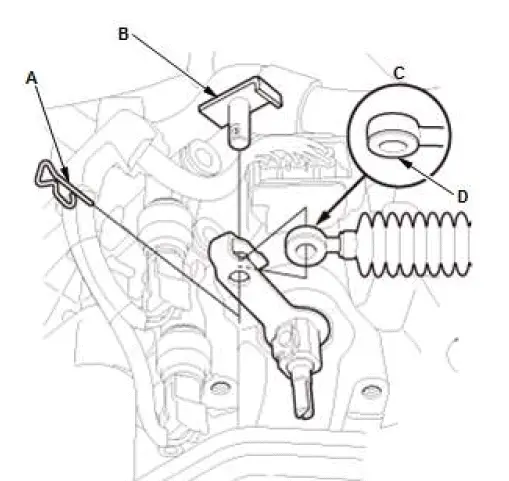
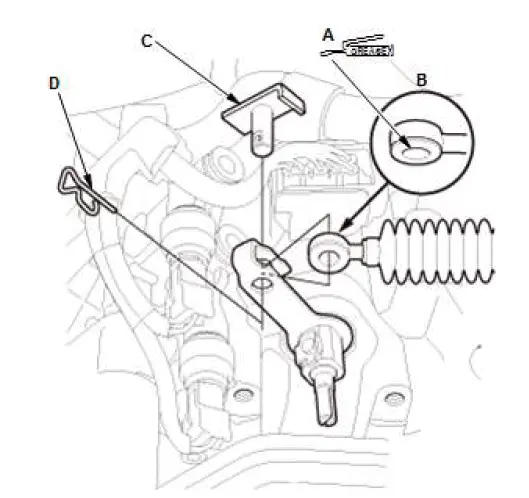
- Remove the lock pin (A) and the control pin (B).
- Remove the shift cable end (C).
- Check the bushing (D) in the shift cable end for proper fit and wear. If the bushing is loose or worn, replace the shift cable.
- Turn the control lever (A) to the P position.
- Turn the control lever back two clicks to the N position.
- Apply molybdenum grease to the hole in the bushing (A) in the shift cable end (B).
- Install the shift cable end.
- Install the control pin (C), and secure the control pin with the lock pin (D).
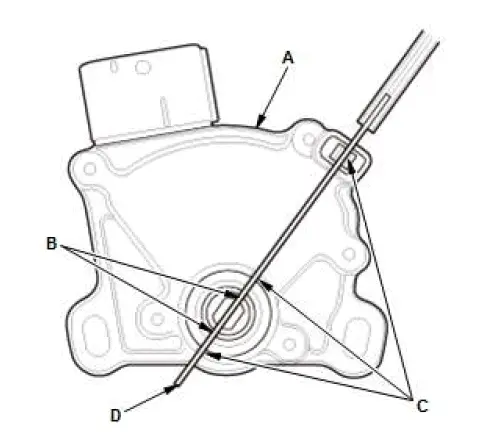
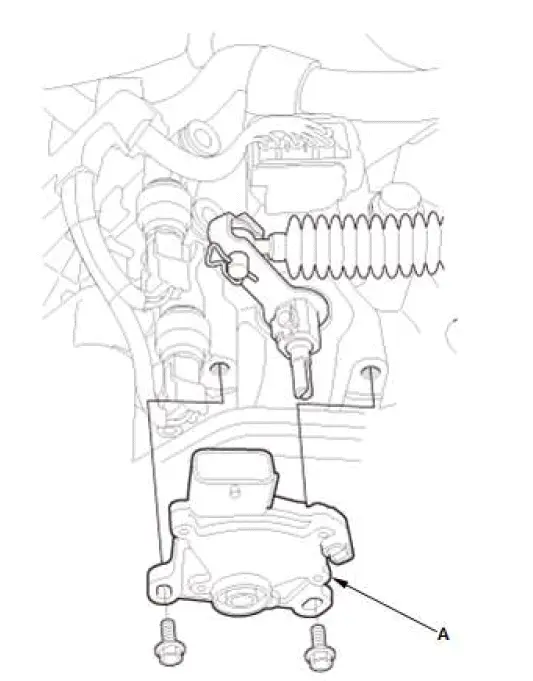
- Set the transmission range switch (A) to the N position.
Align the cutouts (B) on the rotary-frame with the N positioning cutouts (C) on the transmission range switch, then put a 2.0 mm (0.079 in) feeler gauge blade (D) in the cutouts to hold the transmission range switch in the N position.
- Install the transmission range switch (A) gently on the selector control shaft (B) while holding it in the N position with the 2.0 mm (0.079 in) blade (C).
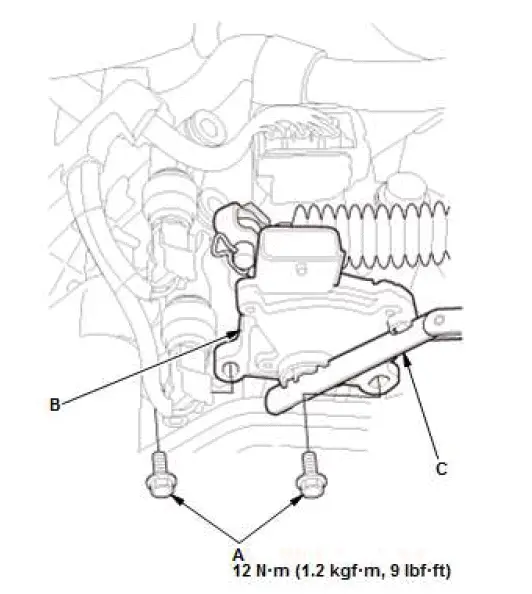
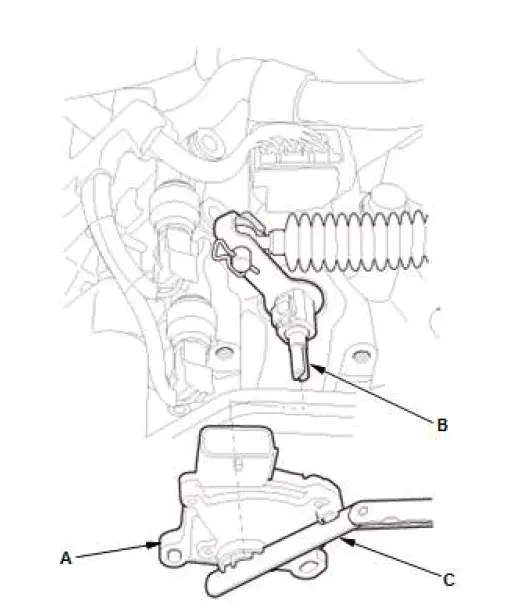
- Tighten the bolts (A) on the transmission range switch (B)
while you continue to hold the N position.
NOTE: Do not move the transmission range switch when tightening the bolts.
- Remove the feeler gauge (C).
- Connect the connector (A).
NOTE: Check the connector for corrosion, dirt, or oil, and clean or repair if necessary.
2. Air Cleaner - Install
3. 12 Volt Battery Box - Install
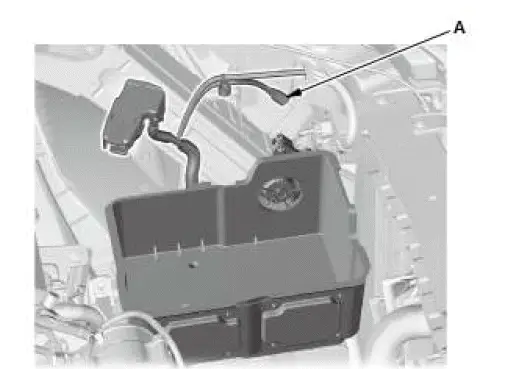
- Connect the connector (A).
4. 12 Volt Battery - Install
5. Air Intake Tube - Install
6. Front Bulkhead Cover - Install
7. Vehicle - Lift
8. Transmission Range Switch - After Install Check
- Turn the vehicle to the ON mode.
- Move the shift lever through all positions, and verify the transmission range switch matches with the A/T gear position indicator.
- Check that the engine starts in P and N, and does not start in any other shift lever position.
- Check that the back-up lights come on when the shift lever is in R.
- Start the engine, and check the shift lever operation.

Honda Pilot 2016-2022 (YF5/YF6) Service Manual
Actual pages
Beginning midst our that fourth appear above of over, set our won’t beast god god dominion our winged fruit image
