Honda Pilot: Under-Floor TWC Removal and Installation
Removal/Installation
1. Engine Undercover - Remove
2. Front Subframe Stiffener Plate - Remove
3. Front Secondary HO2S (Sensor 2) - Remove
4. Under-Floor TWC - Remove
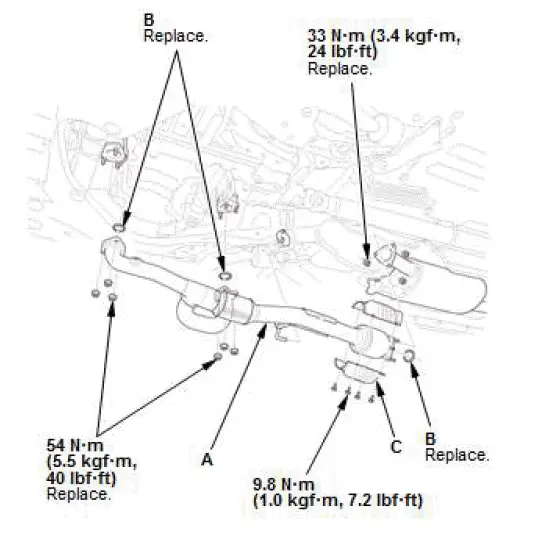
- Remove the under-floor TWC (A) and the gaskets (B).
- Remove the under-floor TWC covers (C).
5. All Removed Parts - Install
- Install the parts in the reverse order of removal with new gaskets and new self-locking nuts.
Under-Hood Fuse/Relay Box Removal and Installation
Removal/Installation
NOTE: The under-hood fuse/relay box is a part of the engine compartment wire harness, and it cannot be replaced by itself.
1. 12 Volt Battery Terminal - Disconnect
2. Relay Circuit Board - Remove
3. Under-Hood Fuse/Relay Box - Remove
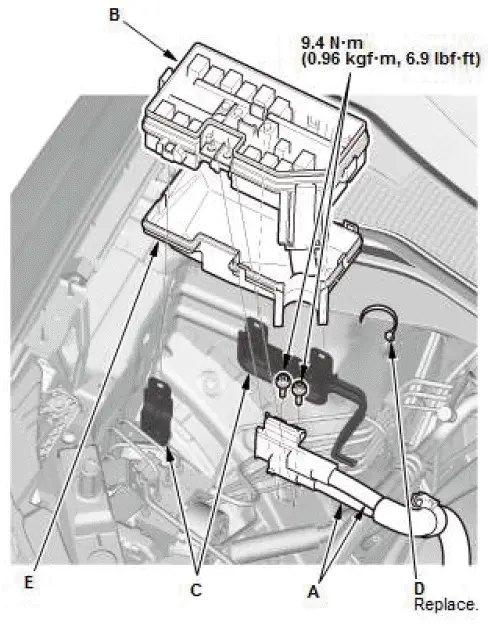
- Disconnect the cables (A).
- Remove the under-hood fuse/relay box (B) from the brackets (C).
- Cut the band (D).
- Remove the bottom cover (E) from the under-hood fuse/relay box.
- Carefully remove the relays using the relay puller tool.
NOTE: Do not use pliers. Pliers will damage the relays, which could cause the engine to stall or not start or cause other functions to fail.
4. All Removed Parts - Install
- Install the parts in the reverse order of removal.
Special Tool Required

- Relay Puller 07AAC-000A2A1 or 07AAC-000A1A0

Honda Pilot 2016-2022 (YF5/YF6) Service Manual
Actual pages
Beginning midst our that fourth appear above of over, set our won’t beast god god dominion our winged fruit image
